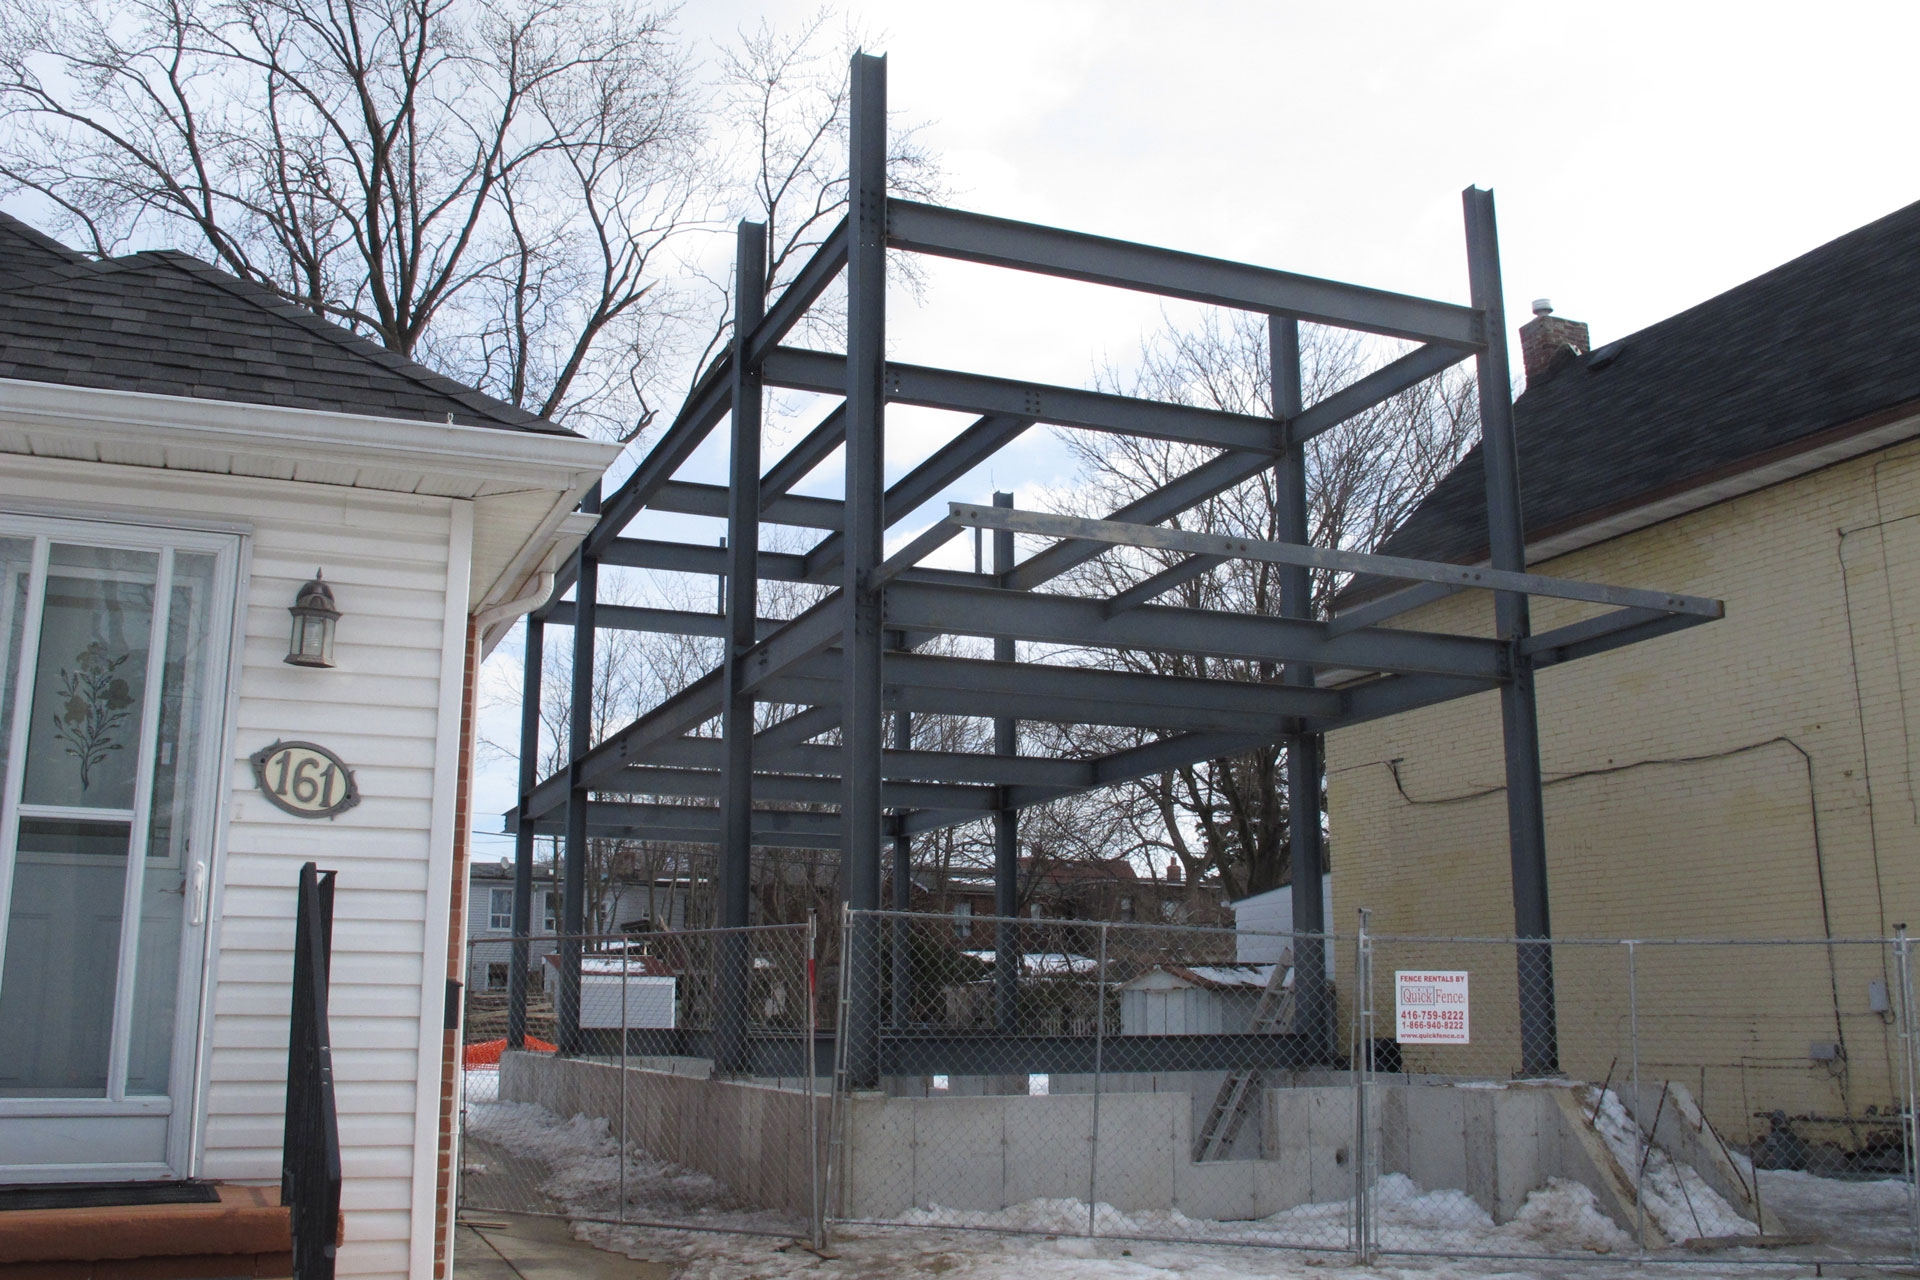
Finally today, all the structural steel installation work has been completed. It’s been nearly 2.5 months since I got the foundation wall completed. Now with all the harsh winter weather going against my, I can finally move onto the next step – wood framing.
Remember this beam that still needed correction after installation day 7?
Well new support structural is welded in place and bolts are installed.
Looks good on both side. Paint primer has been applied to the welding area as well.
And then there’s this bolt that’s not fully tightened after installation day 8.
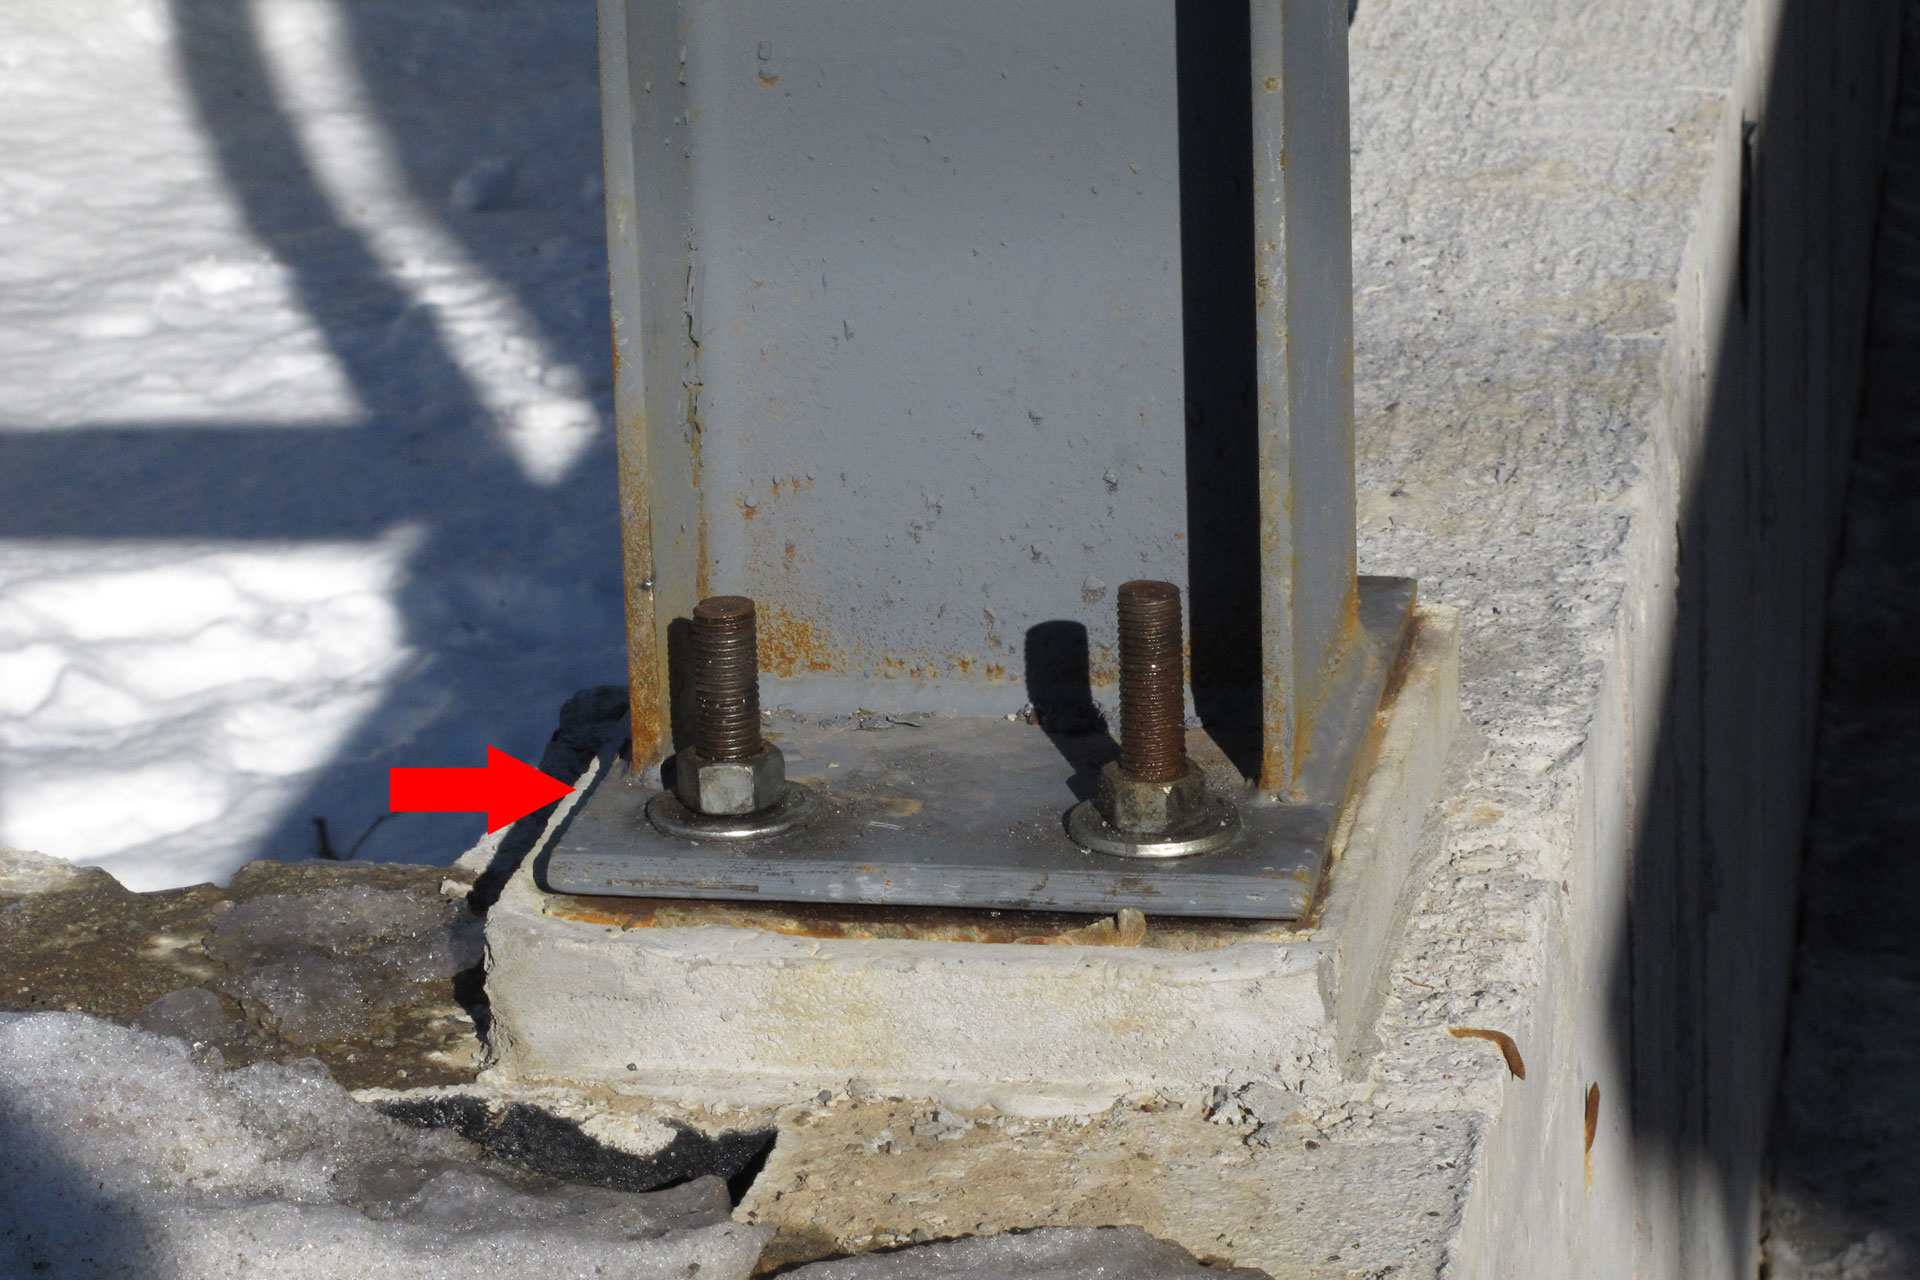
It is now all the way down and we are good to go.
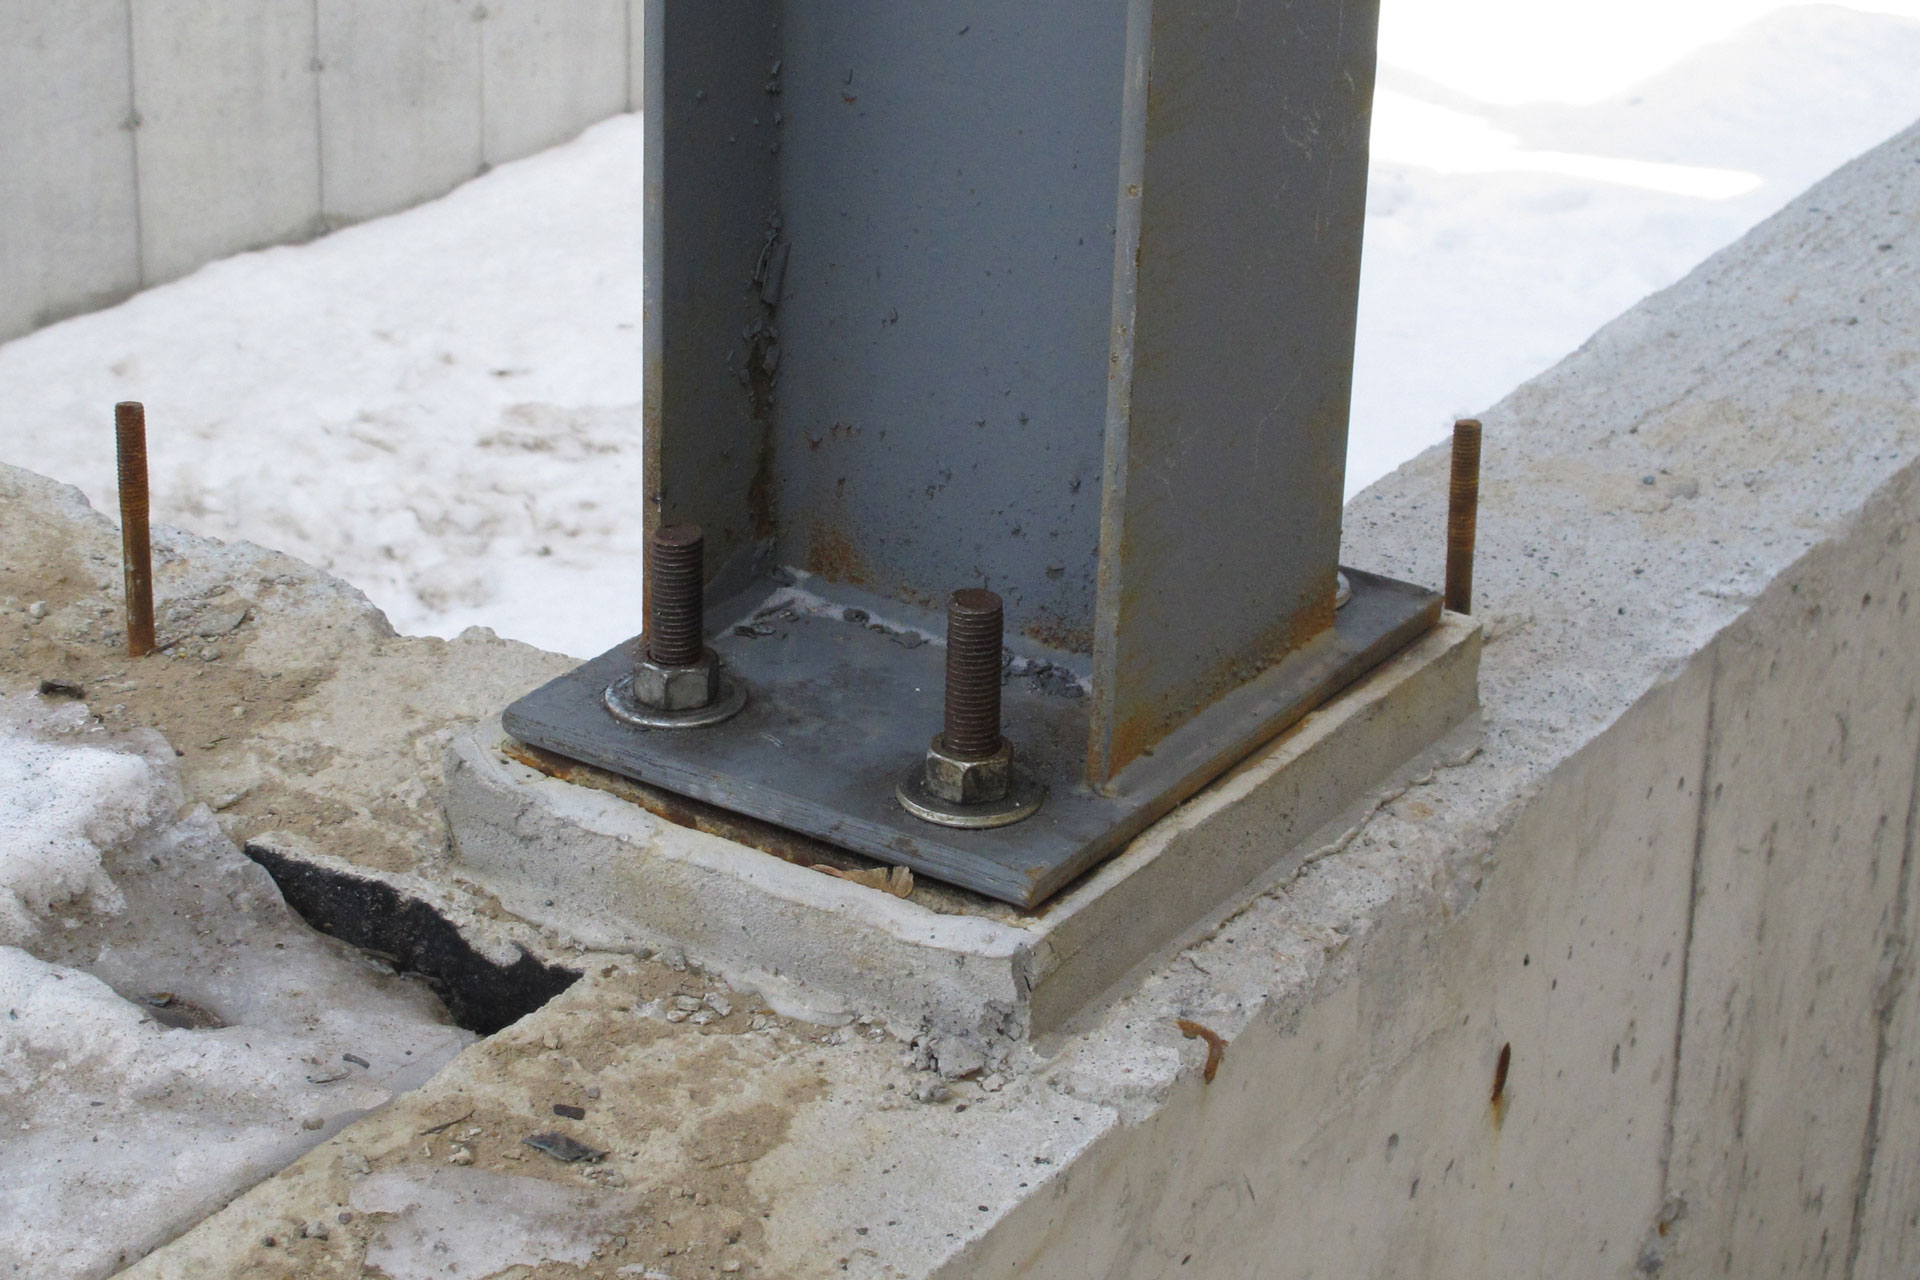
And for those who want a see a bit more detail of the steel structure. Here’s a close up on the base of one of the columns. On top of the foundation wall pier, there’s 2 inch of non-shrinking grout and a steel plate. The column is a steel wide flange beam welded to another steel plate. The column and the plate is secured to the pier using 4 bolts.
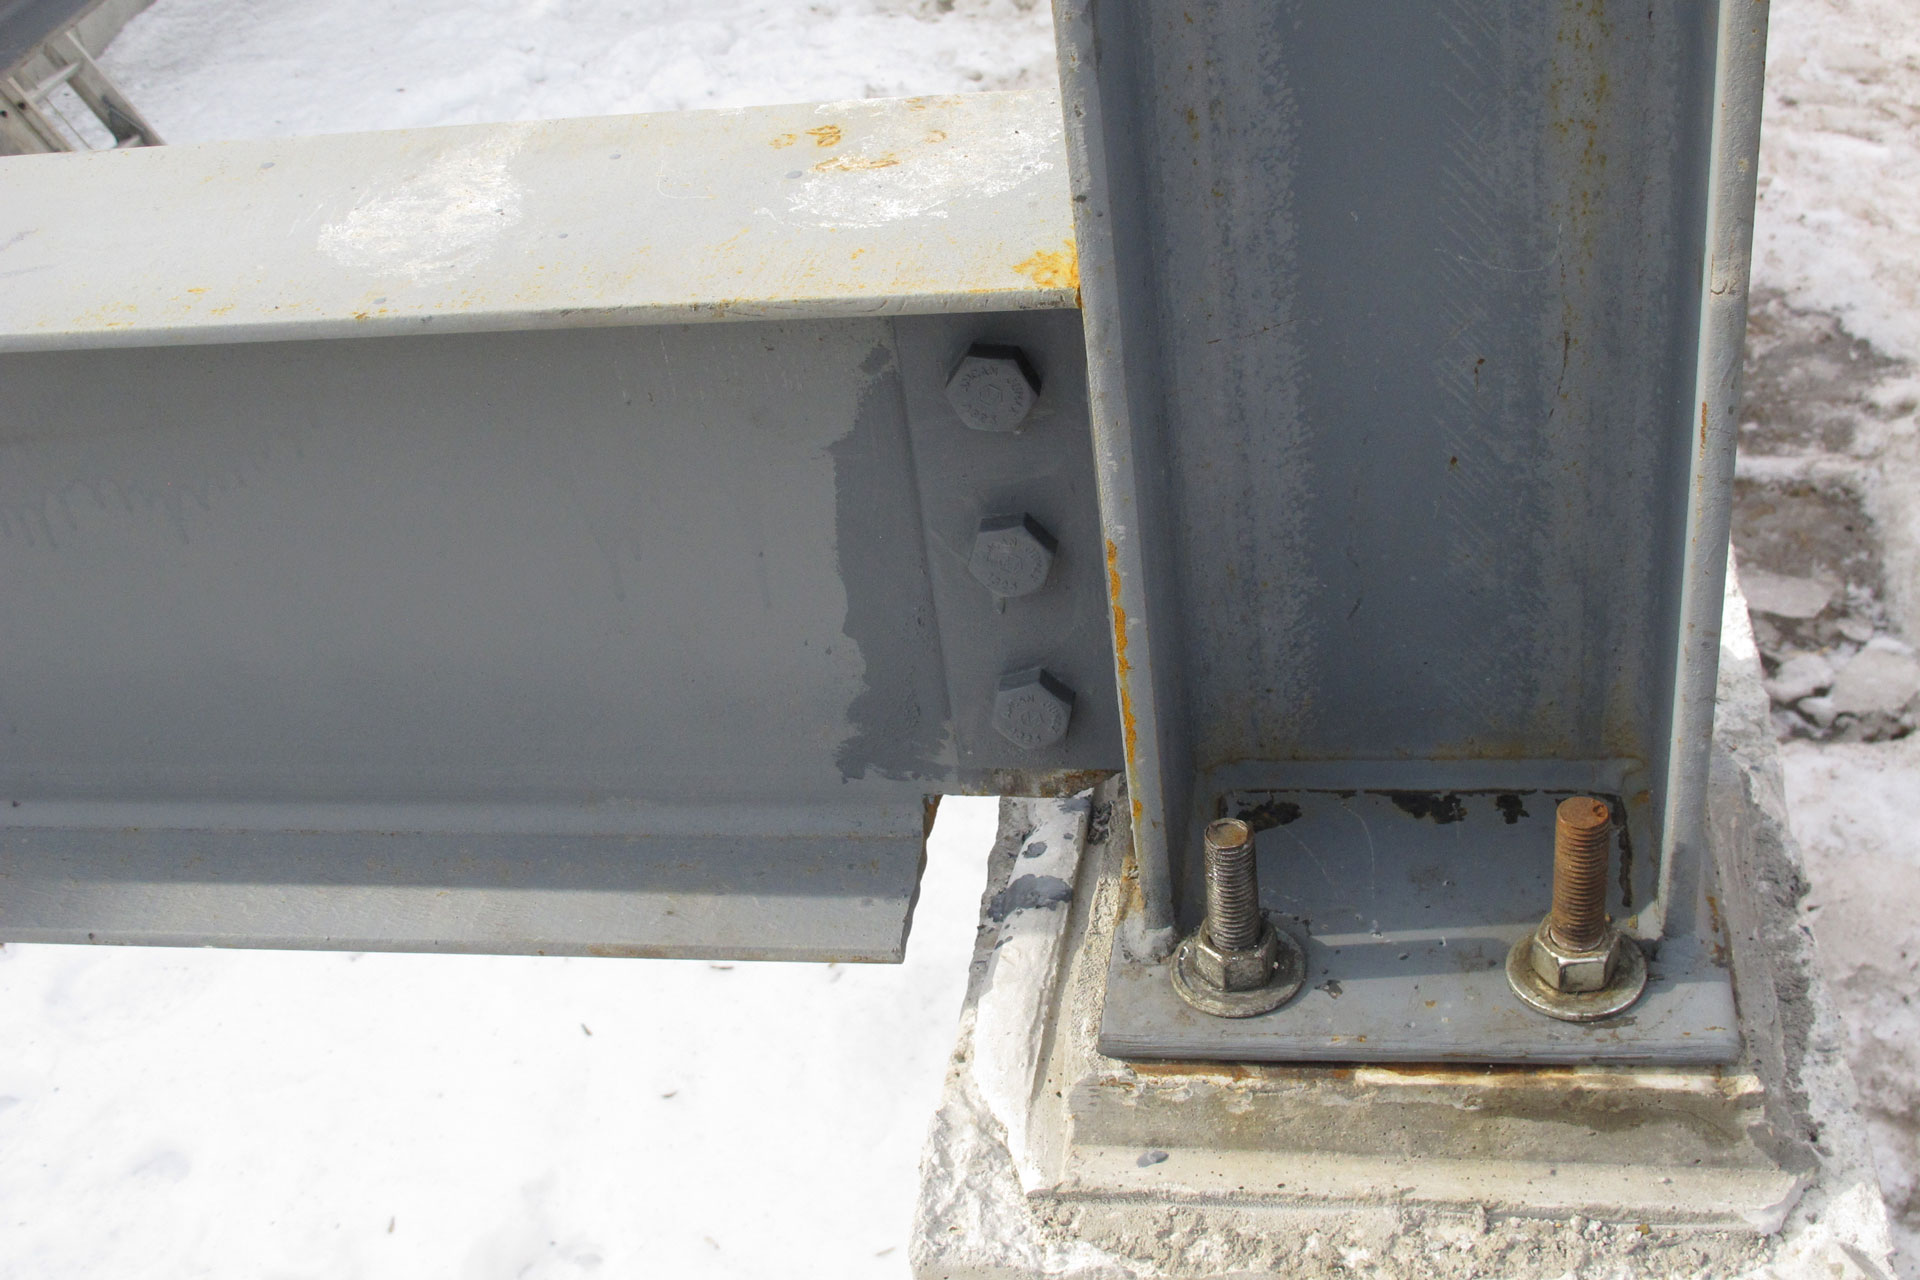
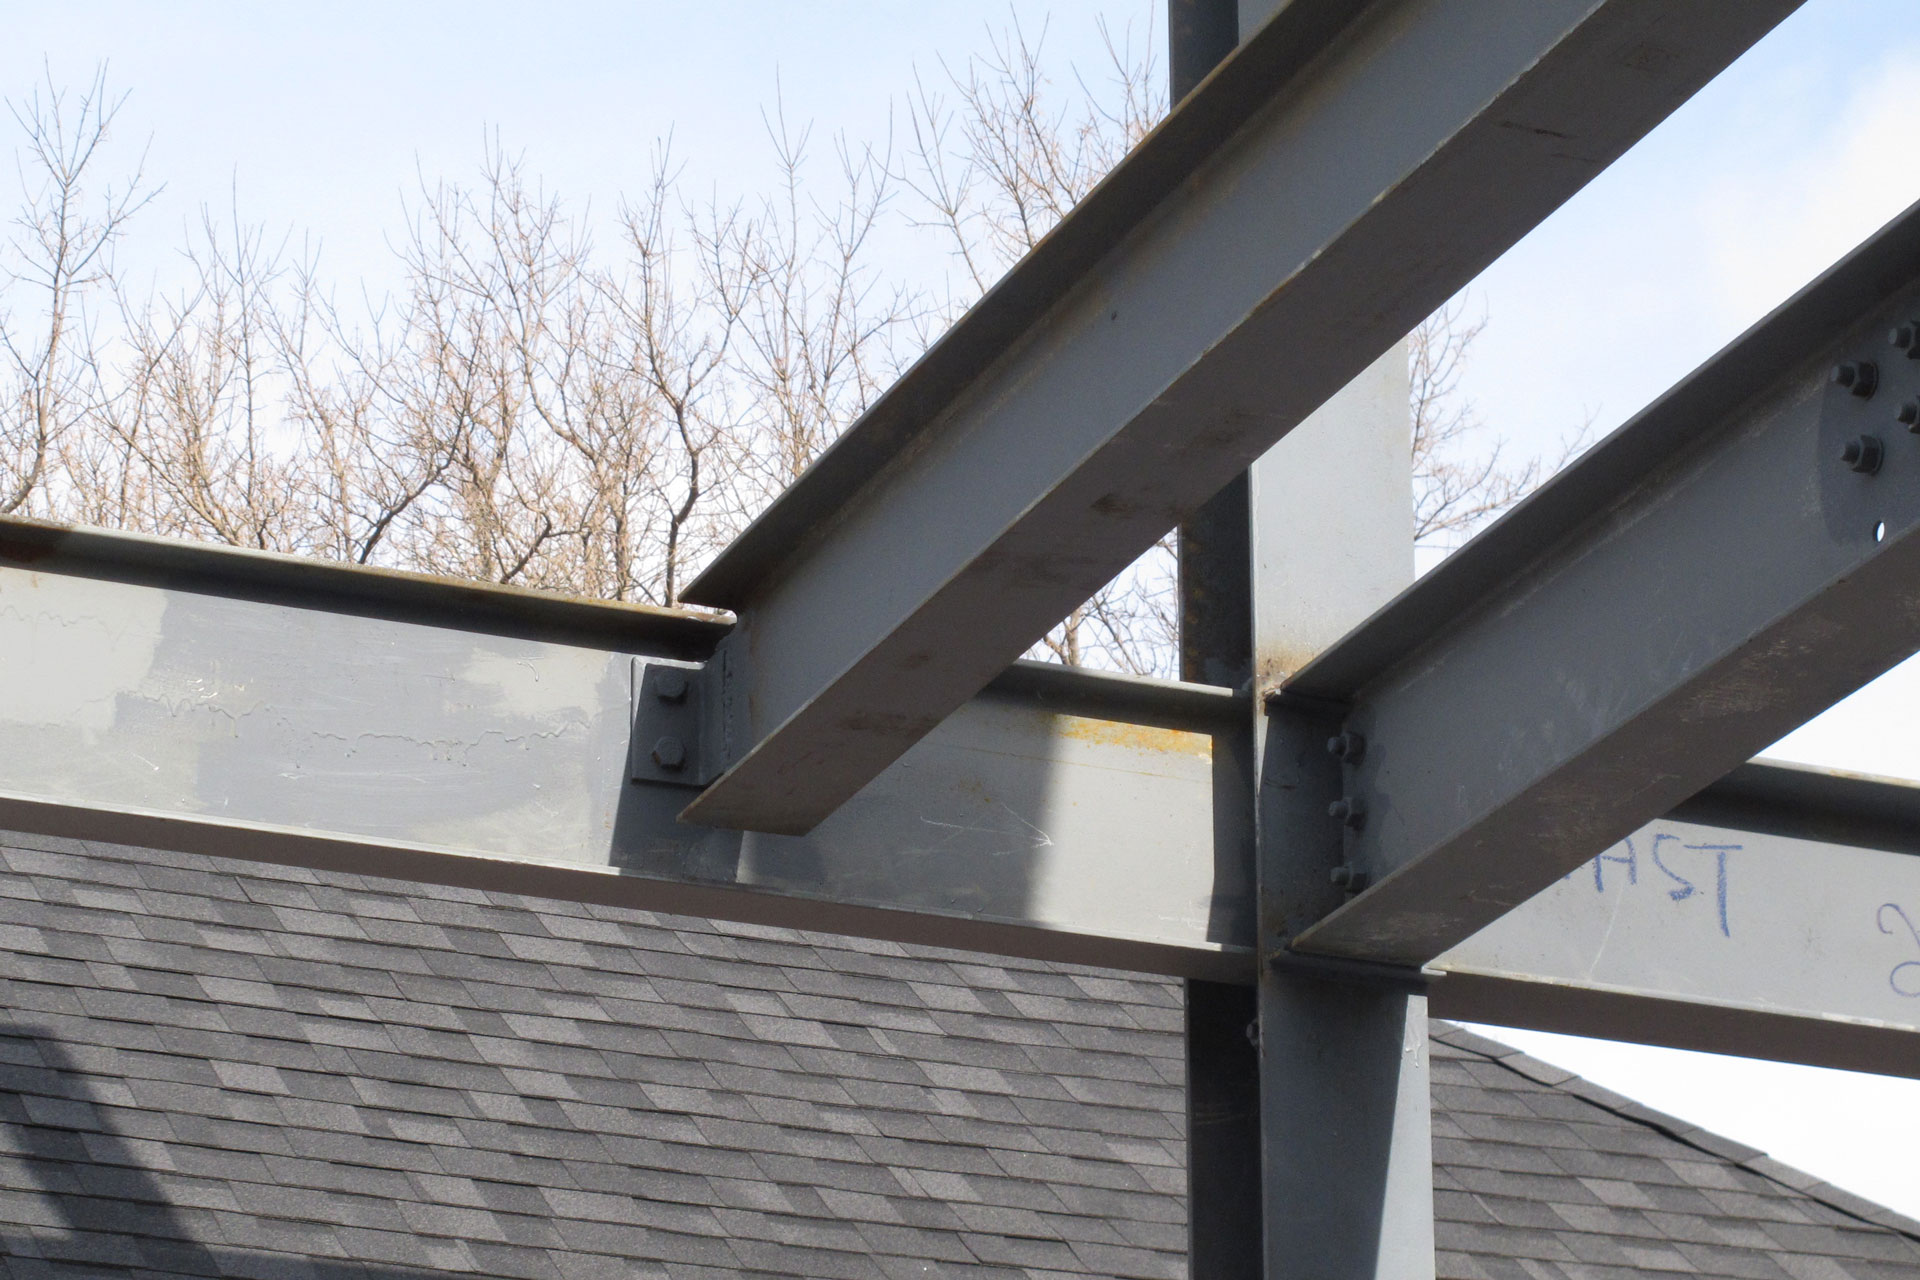
This beam is then secured to the column using a shear connection. There are two full depth web angles, one on each side and 3 bolts to secure it. A shear connection can only resist lateral forces and cannot resist rotational forces. The beam shown here is the beam that goes across the foundation wall on the ground floor level. And since it is at the base of the columns, rotational force really isn’t of a concern here and hence the shear connection.
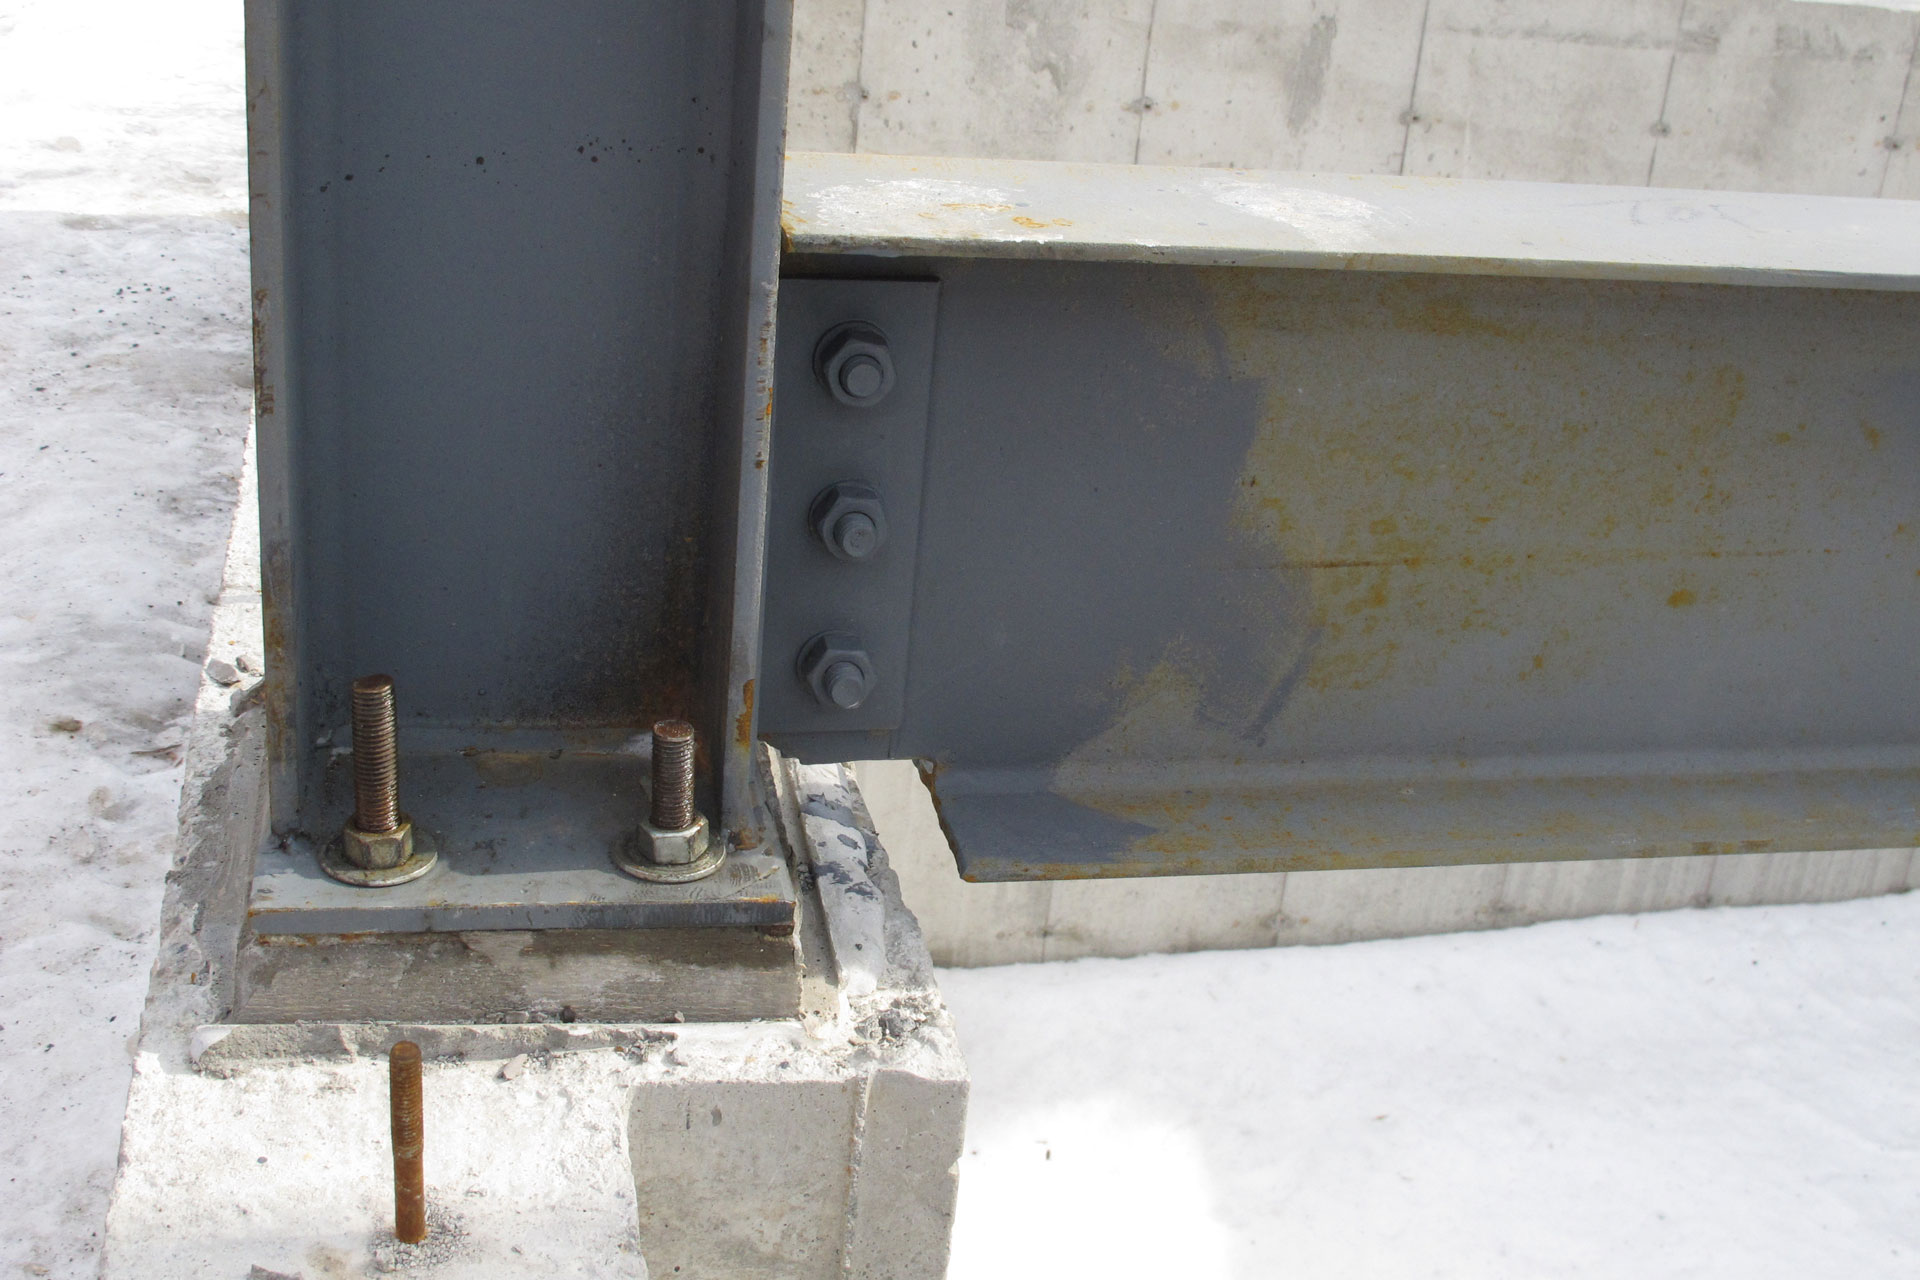
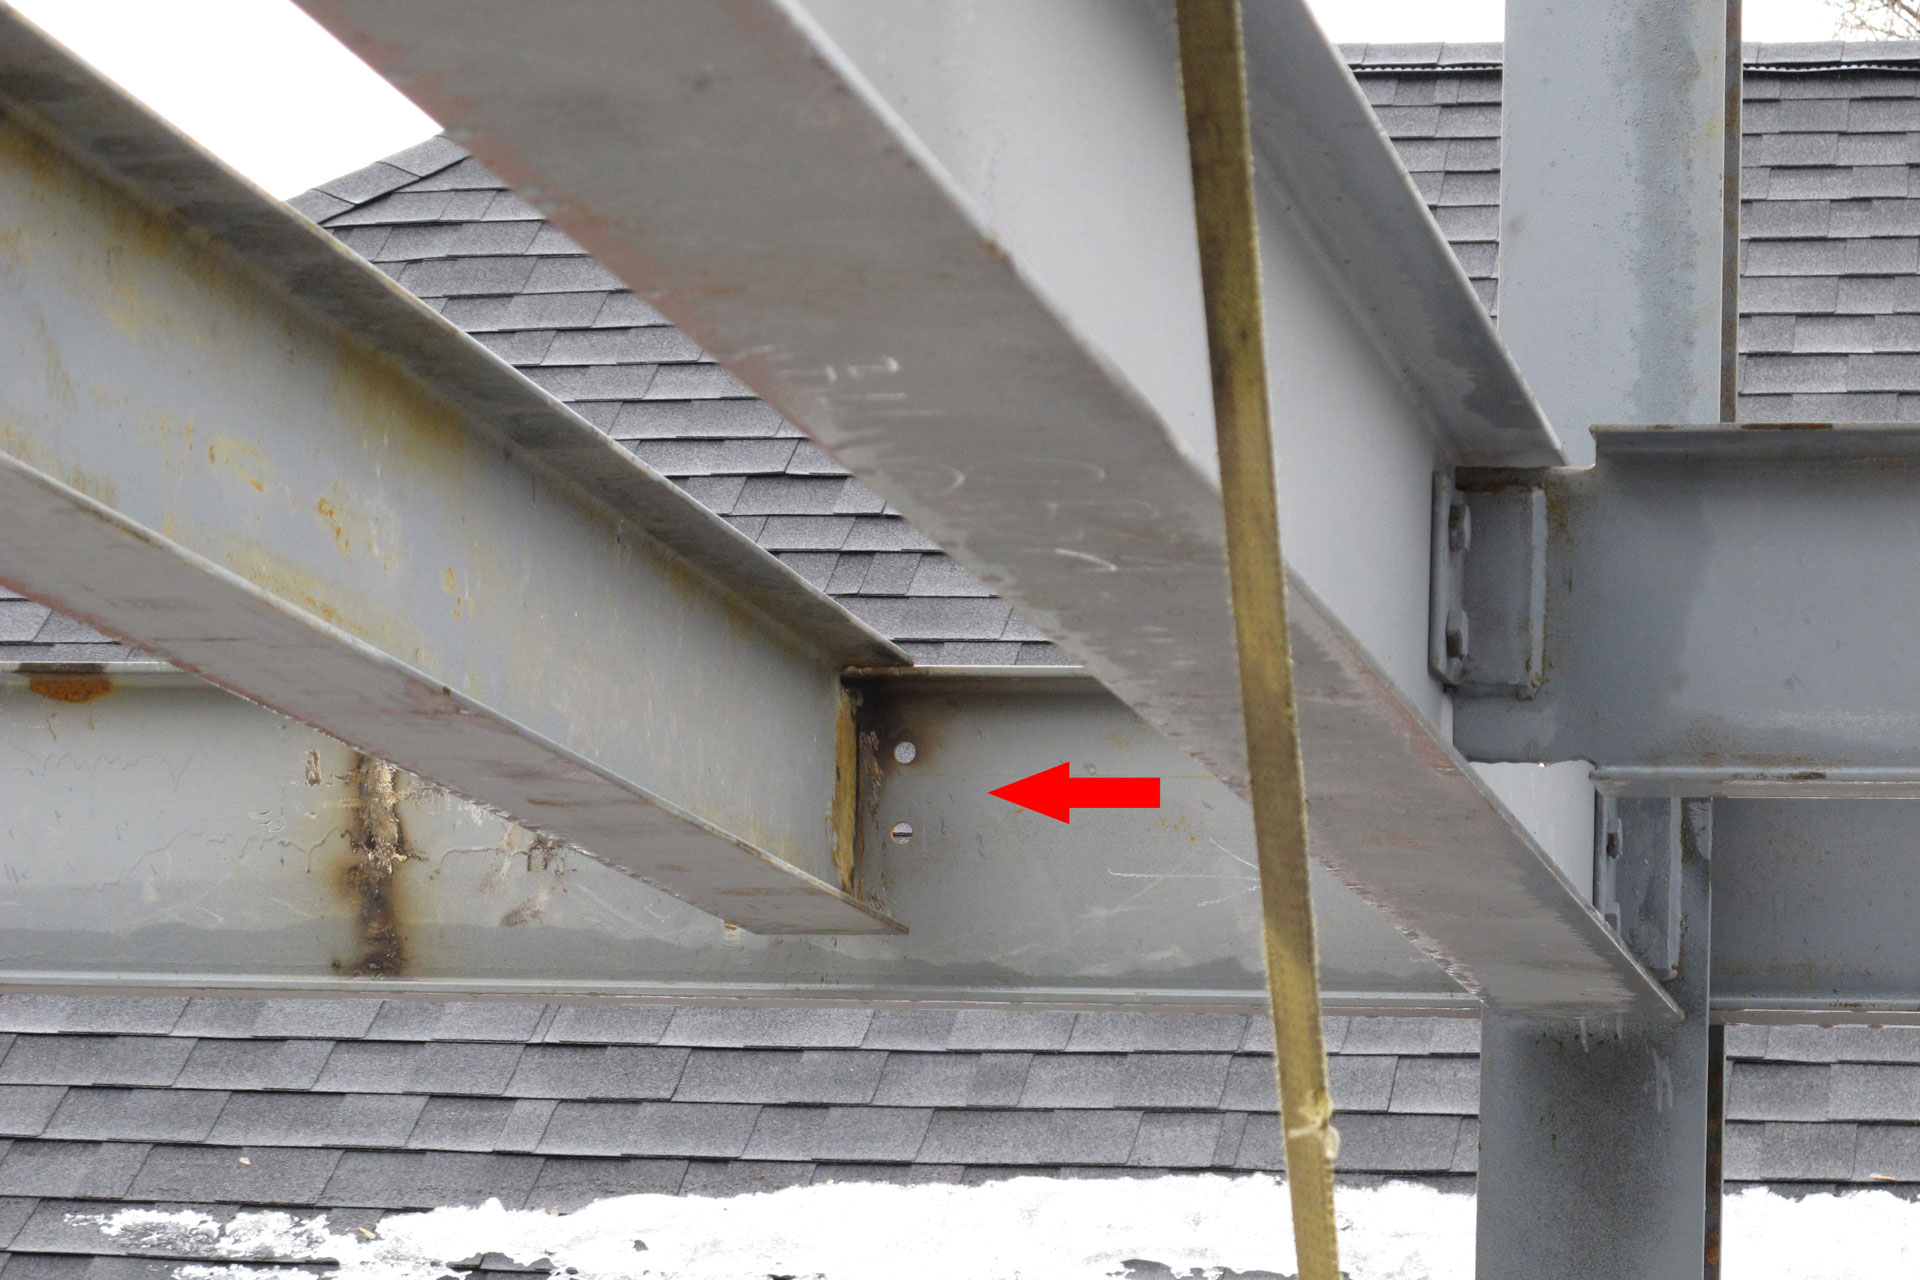
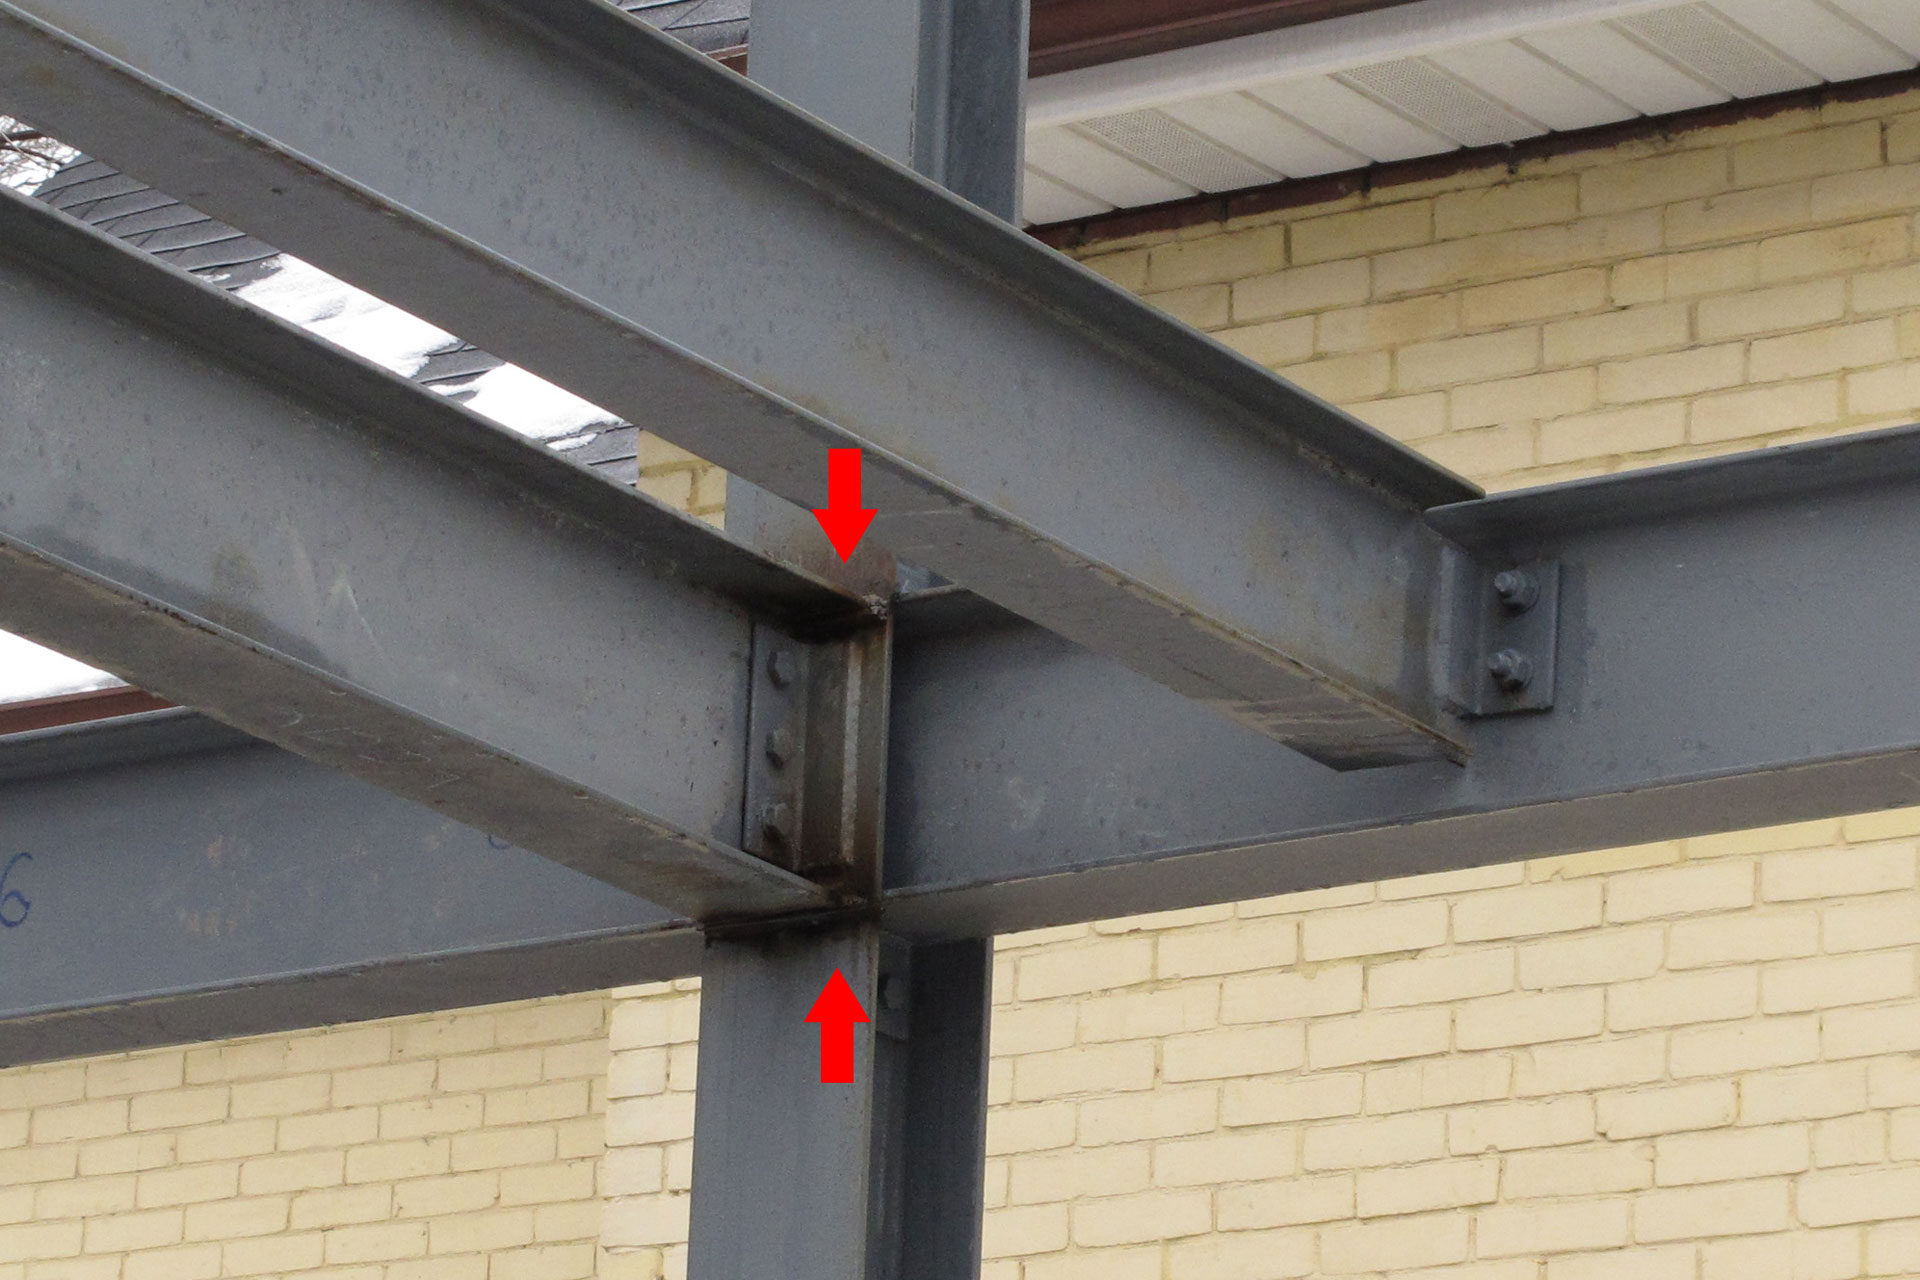
And here’s a moment connection on the left. You can see there’s a web angle welded to the column. The beam is secured to the web angle using 3 bolts. So far it is no different than the shear connection above. However, notice the red arrow is pointing at that the beam flange is fully welded to the column using a CJP (Complete Joint Penetration) weld. The welding allow the bending moment to be handled by the flanges. So this connection can resist rotational forces. You can see how different it is compare to another shear connection just to the right. The moment connection to the left is to provide structural for the 2nd floor. The shear connection to the right is there to support the front edge of the area where it is open to the first floor.
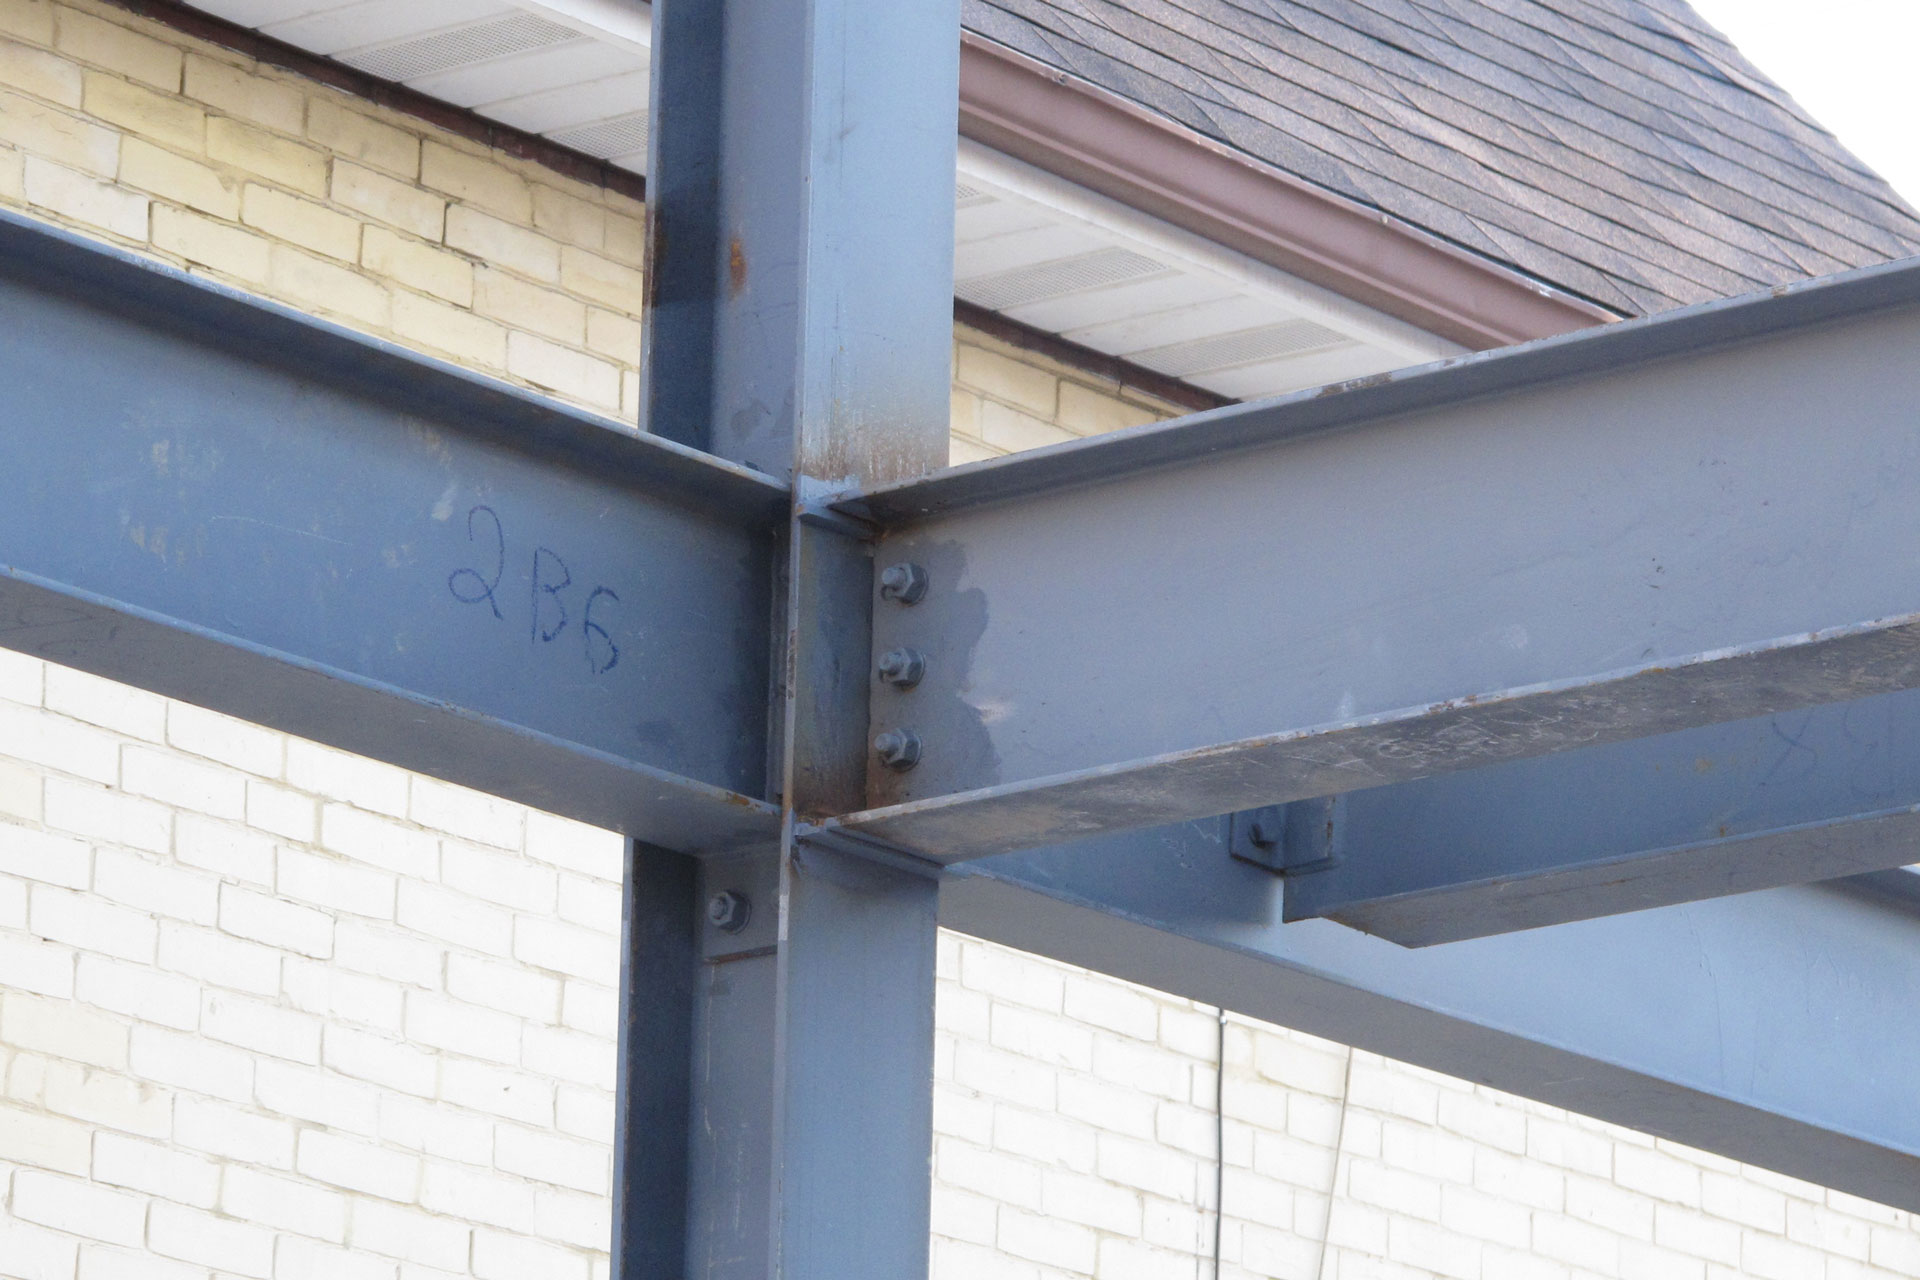
On my house, this kind of moment connections are used on all the beams that goes across (north-south) the structure. There are 8 piers and 8 columns, so there are 8 such moment connections for 2nd floor and 8 more for 3rd floor for a total of 16 connections. A lot of welding work was done here to create this structure. Here’s another photo of the welded moment connection from the other side.
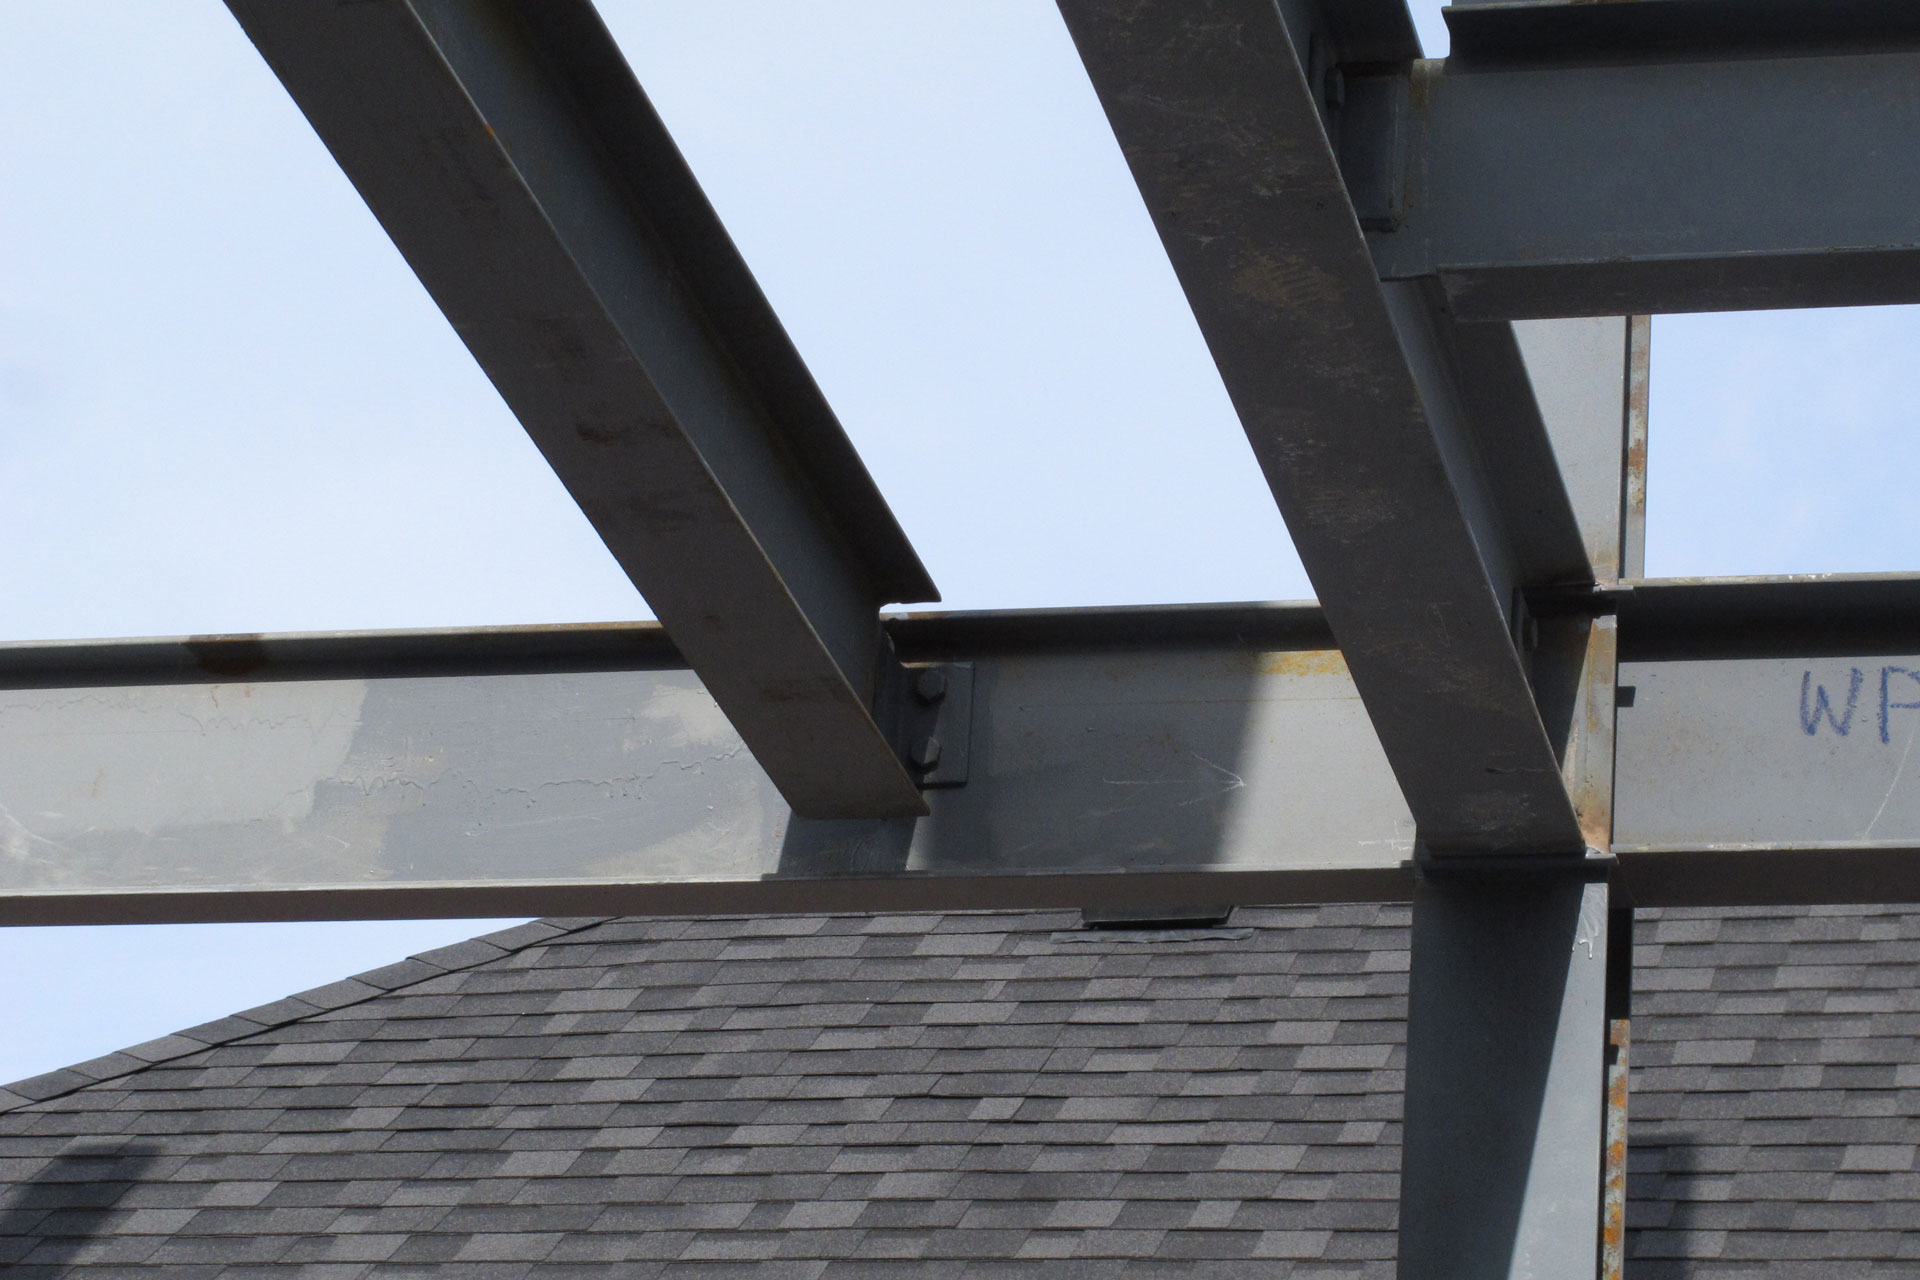
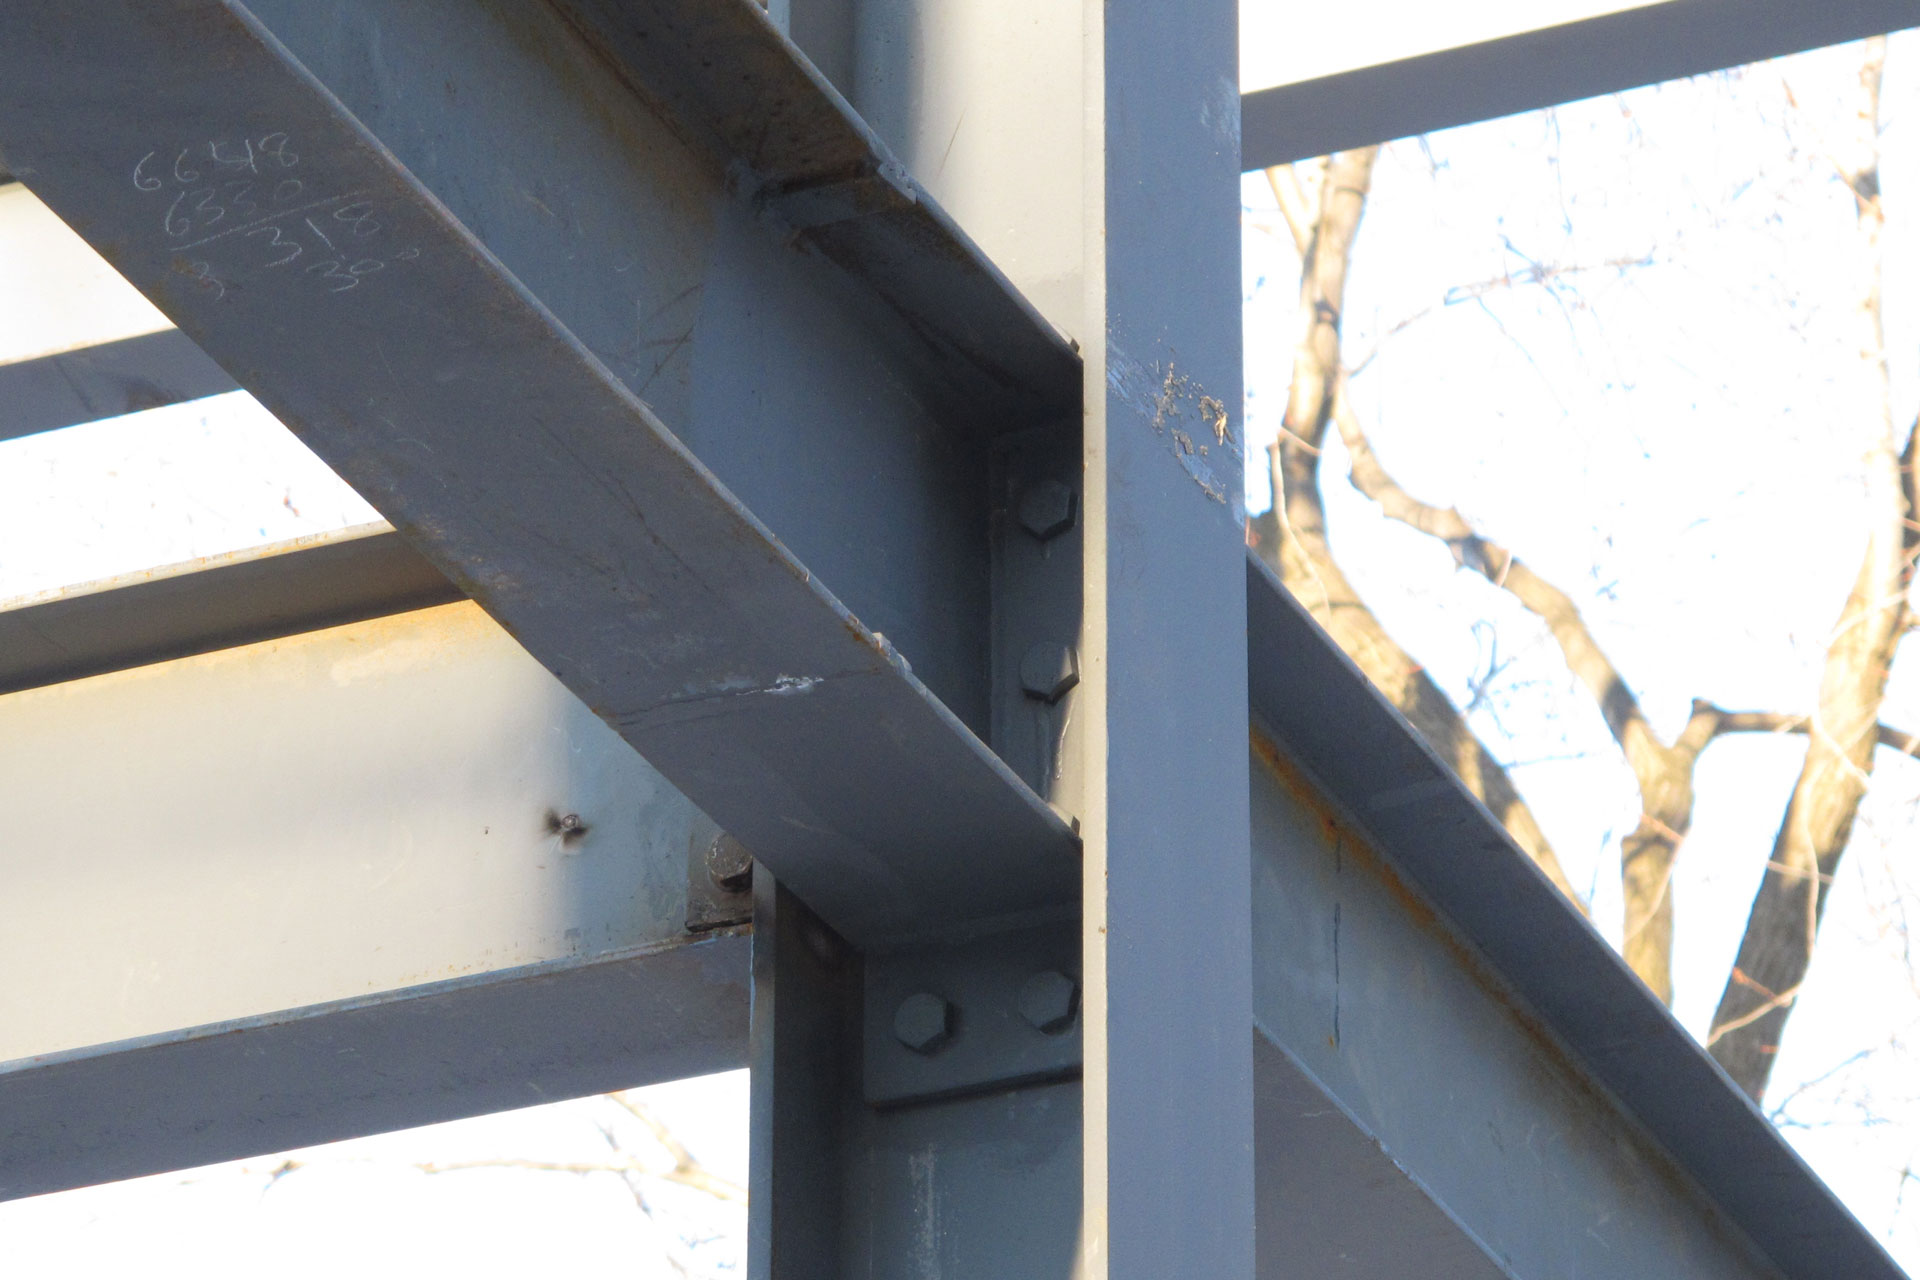
The rest of the perimeter beams are connected to the columns’ web. So an extended end-plate beam to column connection is used. As see on the photo below. The beam is welded to an end plate. The end plate then gets bolted right between the column’s flanges onto the column’s web. Bolts are used to secure the connection providing resistance to both shear and rotational forces.
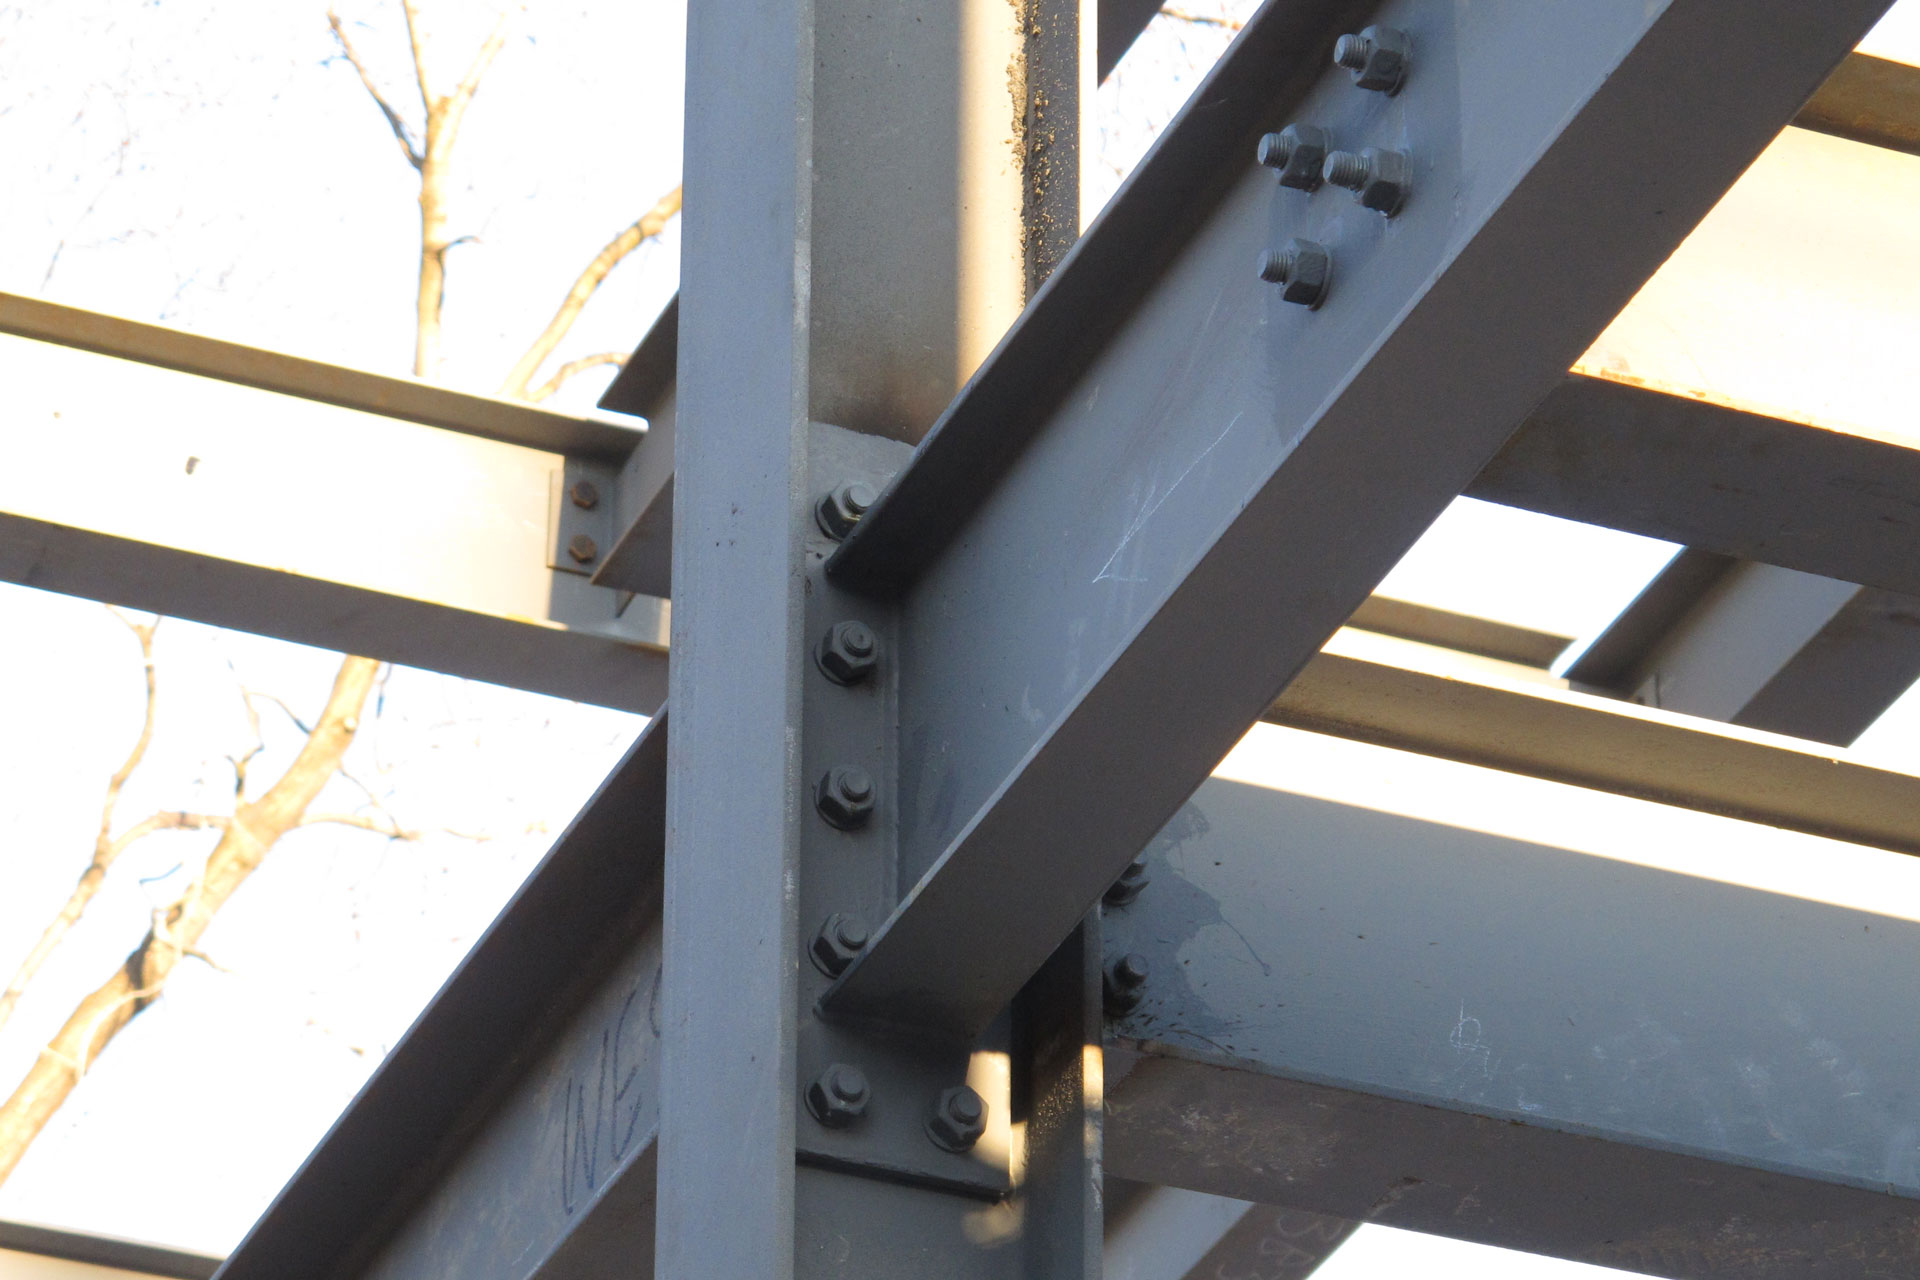
Another photo of a different end-plate connection.
And it is because of all these complicated and time consuming connections and bit of bad winter weather, that my structural steel took over 8 working days to install. But I am very happy now that it is installed. Framer is scheduled to staring framing the floors and walls starting next Tuesday, March 4th.
Leave a Reply
You must be logged in to post a comment.