Because of the structural steel, our exterior wall needs to be at least 8.5″ thick to hide all the steel beams. I have done some research on wall constructions to see how to construct that 8.5″ thick wall that will provide the best performance. And we ended up with a design with deep Swedish roots. In this post, I will try to explain why we framed the wall the way we did.
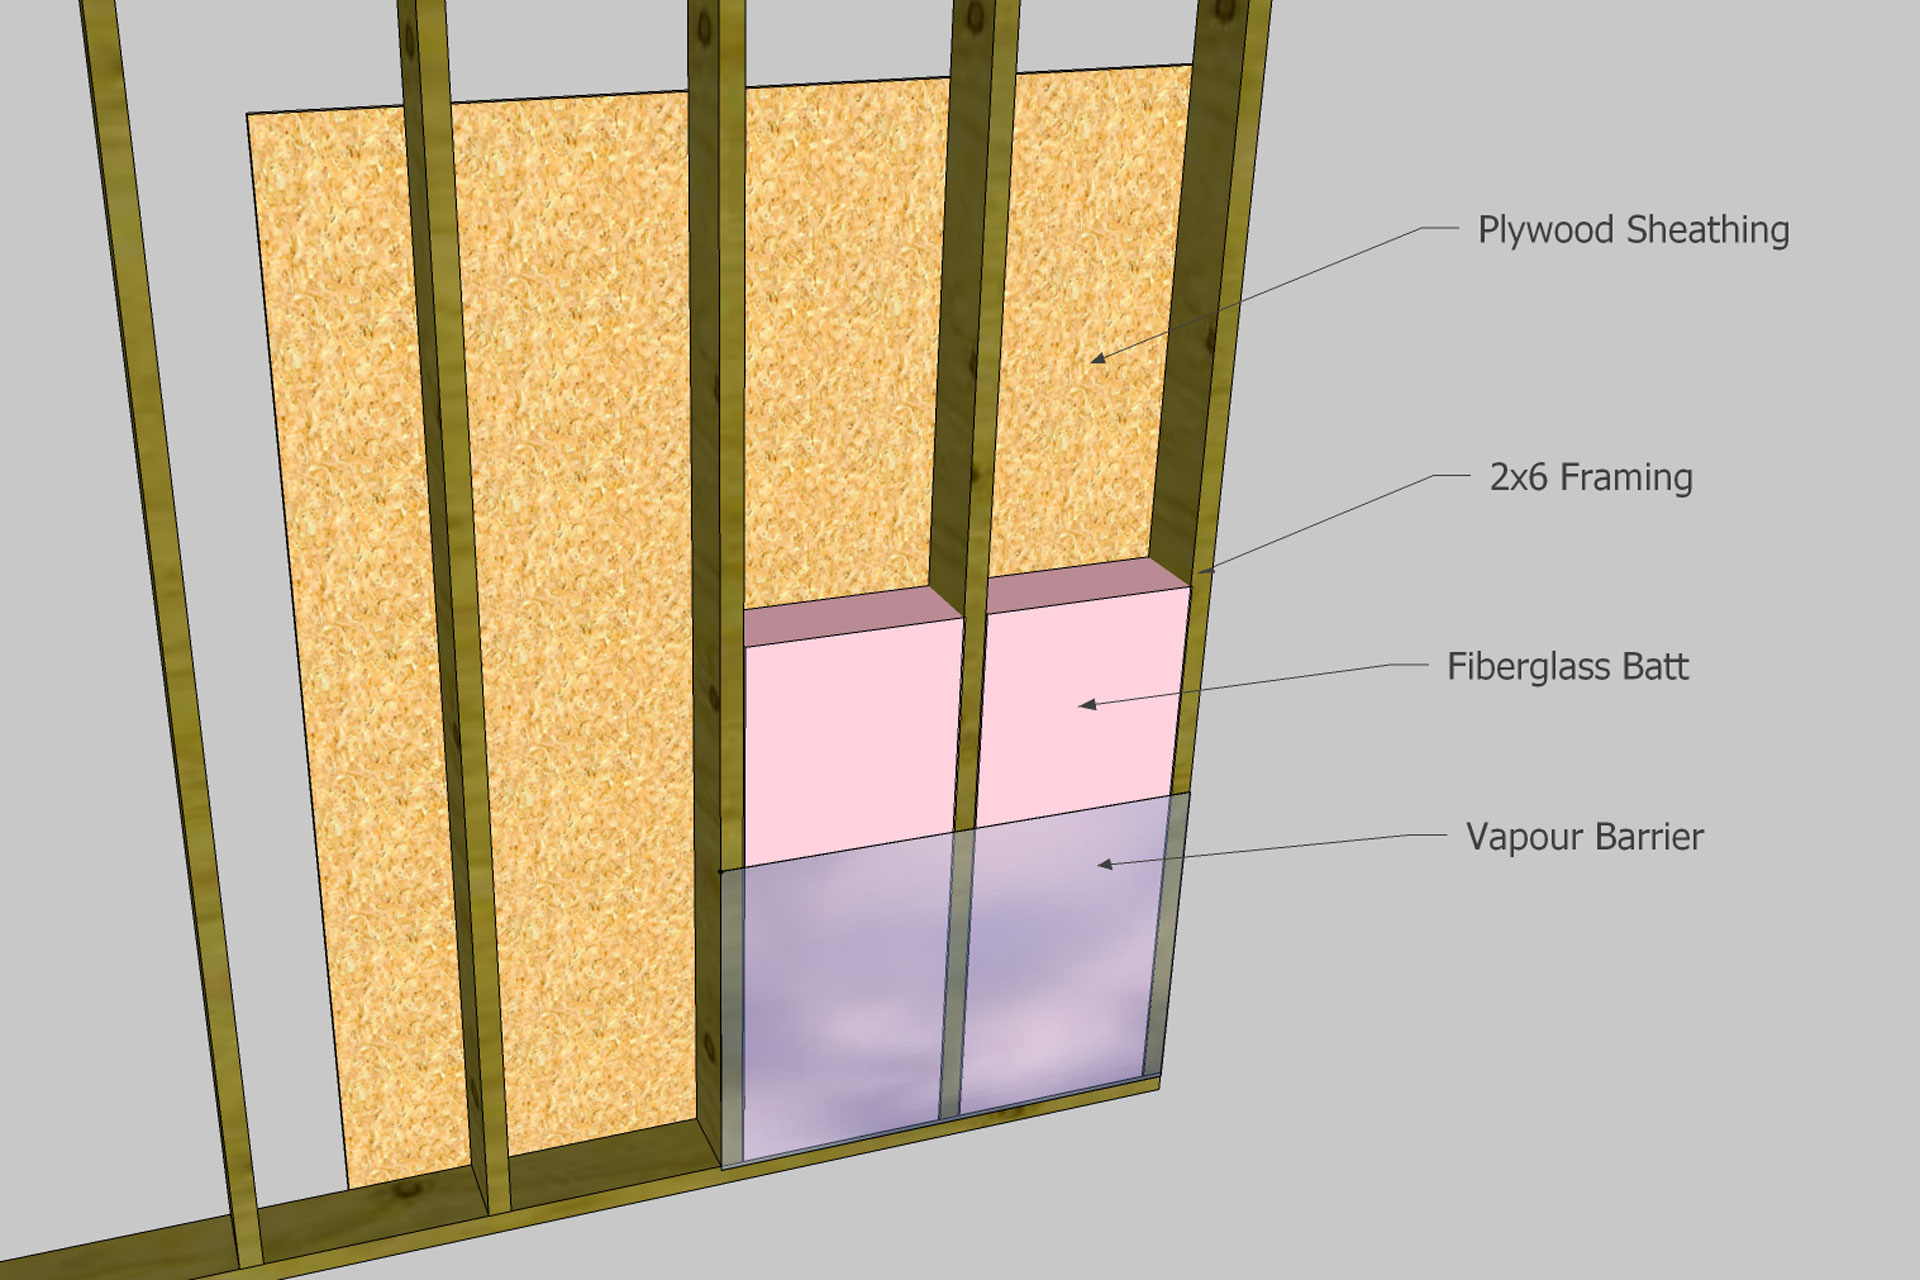
The illustration below is what a traditional stud-framed wall looks like. To satisfy minimum code with the use of fiberglass insulation, the walls are constructed as a 2×6 stud-framed wall. Plywood or more commonly seen now OSB (Oriented strand board) wall sheathing on the outside. The stud cavity is typically filled with figerglass batts which offers about R20. Then 6 mil polyethylene vapour barrier is added to the inside and gypsum drywall to finish up the interior. That’s how a typical wall is constructed today.
So what are the problem with the current stud-framed wall? Because we choose to have a full steel support structure, none of the exterior walls are load bearing. So structural rigidity is not what I need to explorer. So naturally I concentrate on the thermal performance of the wall. There are three basic ways heat transfer can occur – Conduction, convection, and radiation. Thermal radiation really doesn’t apply to a wall structure, so I will be looking only at conduction and convection.
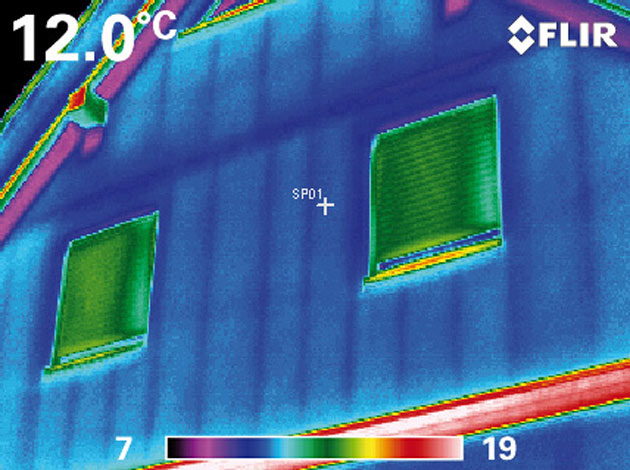
The first problem of a traditional stud-framed wall is thermal bridging which has to do with heat conduction. In a traditional stud-framed wall, the wall sheathing which is in the cold zone is in direct contact with the 2×6 studs. And the inside of the 2×6 studs is also in direct contact with the warm zone. While thermal conductivity of soft wood and plywood is at 0.12 W/(m.K), which is low if you compare to steel at 42 W/(m.K), it is still 5 time higher than air which is at 0.024 W/(m.K) and 3 time higher than fiberglass insulation 0.04 W/(m.K). As so the studs are losing more heat than your insulation. As one can see from a sample thermal imagine from FLIR shows that the studs in this wall are actually much colder than the cavity space.
The way to address thermal bridging is to reduce or eliminate the transfer of heat by either reducing the conductive path or to introduce a thermal break in the conductive path. And we’ll see how our wall design tries to address this issue of thermal bridging.
The second problem is convective heat transfer. The convection of heat is carried out by means of air flow. Air itself is not very good at conducting heat, it has a thermal conductivity of only 0.024 W/(m.K), but natural convection of air between the warm and cold zone allow heat to transfer between the two. Fiberglass insulation is meant to trap the air to reduce such convection. And the air barrier is mean to reduce draft for penetrating the building envelope and air leakage. And the vapour barrier is there to reduce the amount of air leakage through the building envelope. However, in a traditional stud-framed wall, the electrical boxes needs to penetrate the vapour barrier which then in turn allow air and water vapour to pass through. There are vapour boxes for electrical boxes such as the one shown below. Once sealed tight it does not allow vapour to escape through.
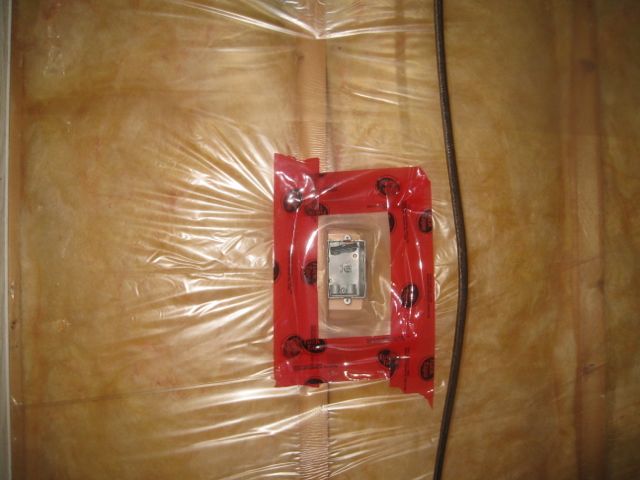
Building code requires that all penetration to be sealed, but not everyone is using vapour boxes like that since wrapping the box in 6 mil polyethylene and then tape or caulk it to the box is just as acceptable. And then of course think about once the home is built and put to real use. There will be more penetration to the vapour barrier since every hole made on the interior wall goes through the vapour barrier. There has to be a better way.
And so here’s where the Swedes comes in. Below is an illustration of a factory built wall by a Swedish company RejnäsVillan. Their stud-framed wall is 195mm x 47mm studs or pretty close to a 7.75″ thick 2×8. The cavity is filled with mineral wool insulation. The outside is then sheathed with a board with a wind barrier. Horizontal furring strips 45mm or 1.75″ thick is added to the outside of the sheathing with the cavity then filled with more mineral wool insulation (not shown). Then the exterior siding is mounted to the furring stripes. On the inside, they will vapour barrier, then add another layer or 45mm or 1.75″ thick horizontal furring strips with the cavity filled with more mineral wool insulation. Then a layer of particle board and finally interior gypsum panels.
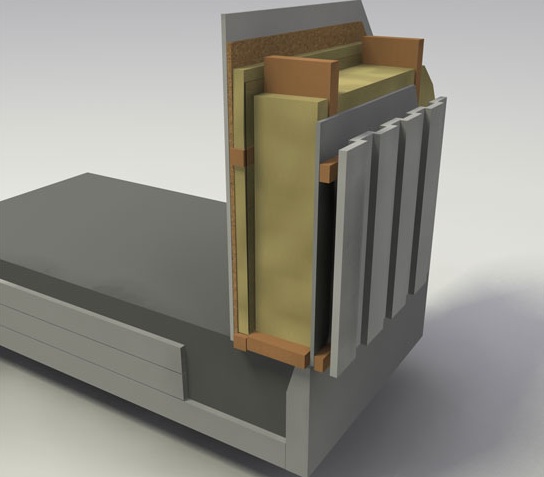
So what’s so good about this Swedish design? Well a few things. The additional insulation outside of the sheathing makes the sheathing warmer compared to the traditional stud-framed wall here in North America. The furring stripes both inside and out reduced the area where thermal bridging can occur to just 45mm x 45mm or 1.75″ x 1.57″ rather than full length of the stud. The mineral wool insulation is denser than fiberglass and therefore allow less air movement. Looking at the inside of the wall, the additional furring on the inside means that electrical work does not have to puncture through the vapour barrier resulting a much air tighter house. And the additional insulation within the cavity bring the wall insulation value even higher. The addition of a particle board before the drywall means you can easily hang your picture frame or shelves. There are much we can learn from the Swedes. Most of the Sweden people live north than most major cities in Canada, they have colder climate and they have been trying to make the house more energy efficient, a lot more so than the builders here in Canada.
So taking in the Swedish design and trying to make it work for my house. Here’s what I have decided to do. The wall will be a 2×6 stud-framed wall. Then on the outside 2×2 strapping at 16″ on center will be added. The plywood sheathing is then nailed to the 2×2. We will insulated the cavity of the 2×2 with Roxul ComfortBoard. The 2×6 cavity will be insulated with Roxul ComfortBatt. On the inside we will put vapour barrier right against the 2×6 stud-framed wall. Then another layer of 2×2 strapping will be added on the inside of the vapour barrier. Electrical works will be ran within this 2×2 strapping. Cavity will be filled with another layer of Roxul ComfortBatt. Then gypsum drywall will be nailed to the 2×2 inside. The total insulation value of the wall will be R6 + R22 + R6 = R34. The insulation value will be even higher once the external acrylic stucco or EIFS (Exterior Insulation and Finish System) is added as the exterior cladding.
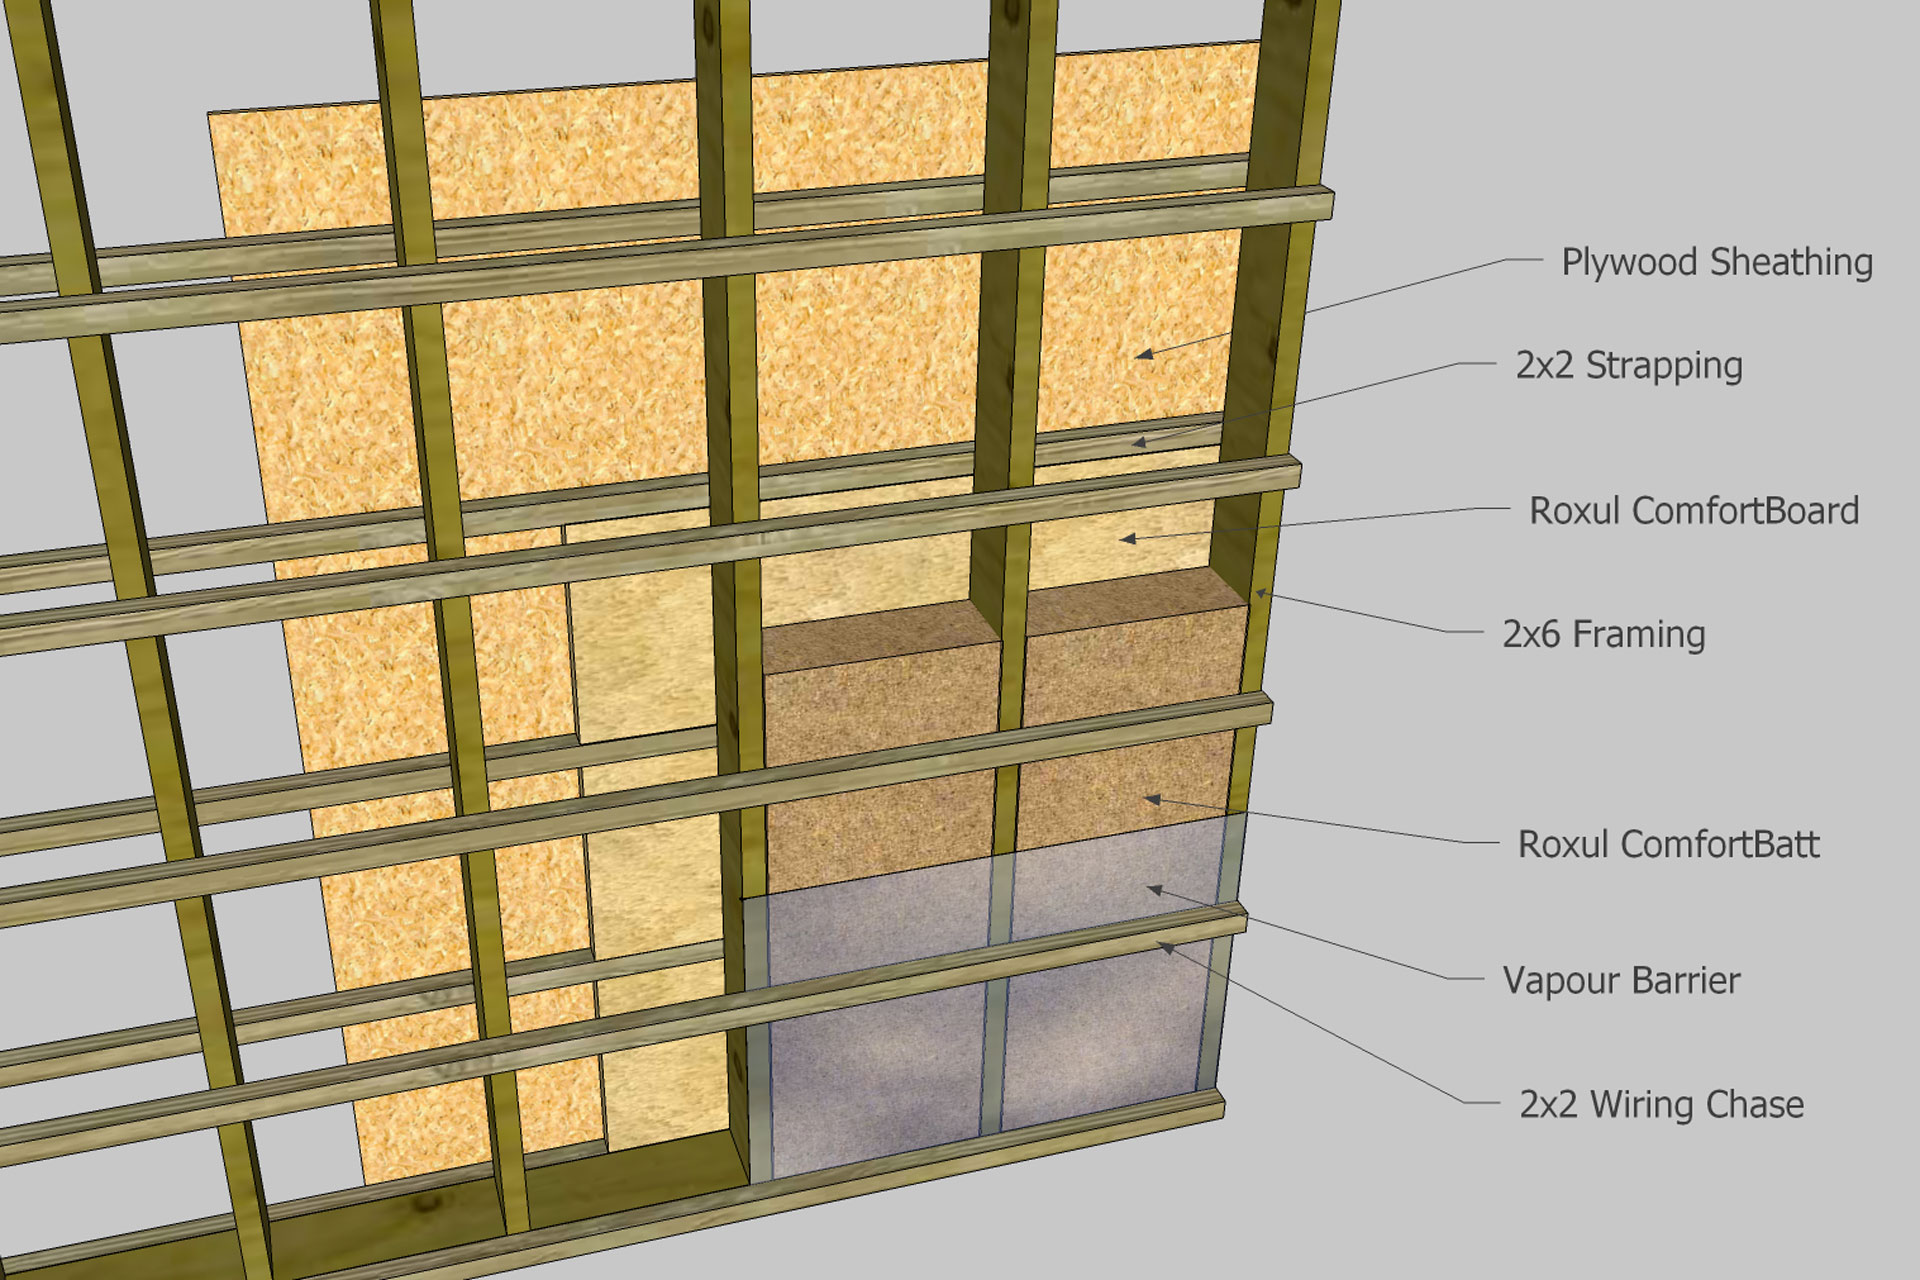
So what are the benefits of this wall design? The two layer of 2×2 strapping outside and inside should actually make this wall stronger. Since the exterior wall sheathing is connected to the strapping and the interior drywall is also connected to the strapping. It isolates the thermal bridging of the stud-framed wall to only where those strapping are connected. Or namely the 1.5″ x 1.5″ area where the strapping are connected to the studs. The vaopur barrier will now be completed seals with no electrical work punctuate through the walls. And hanging pictures or shelves on the wall no longer punctures the vapour barrier either. The horizontal strapping should make horizontal cable runs much easier since there’s no more need to drill through the studs. And finally this makes the wall 8.5″ thick, exactly as I needed to.
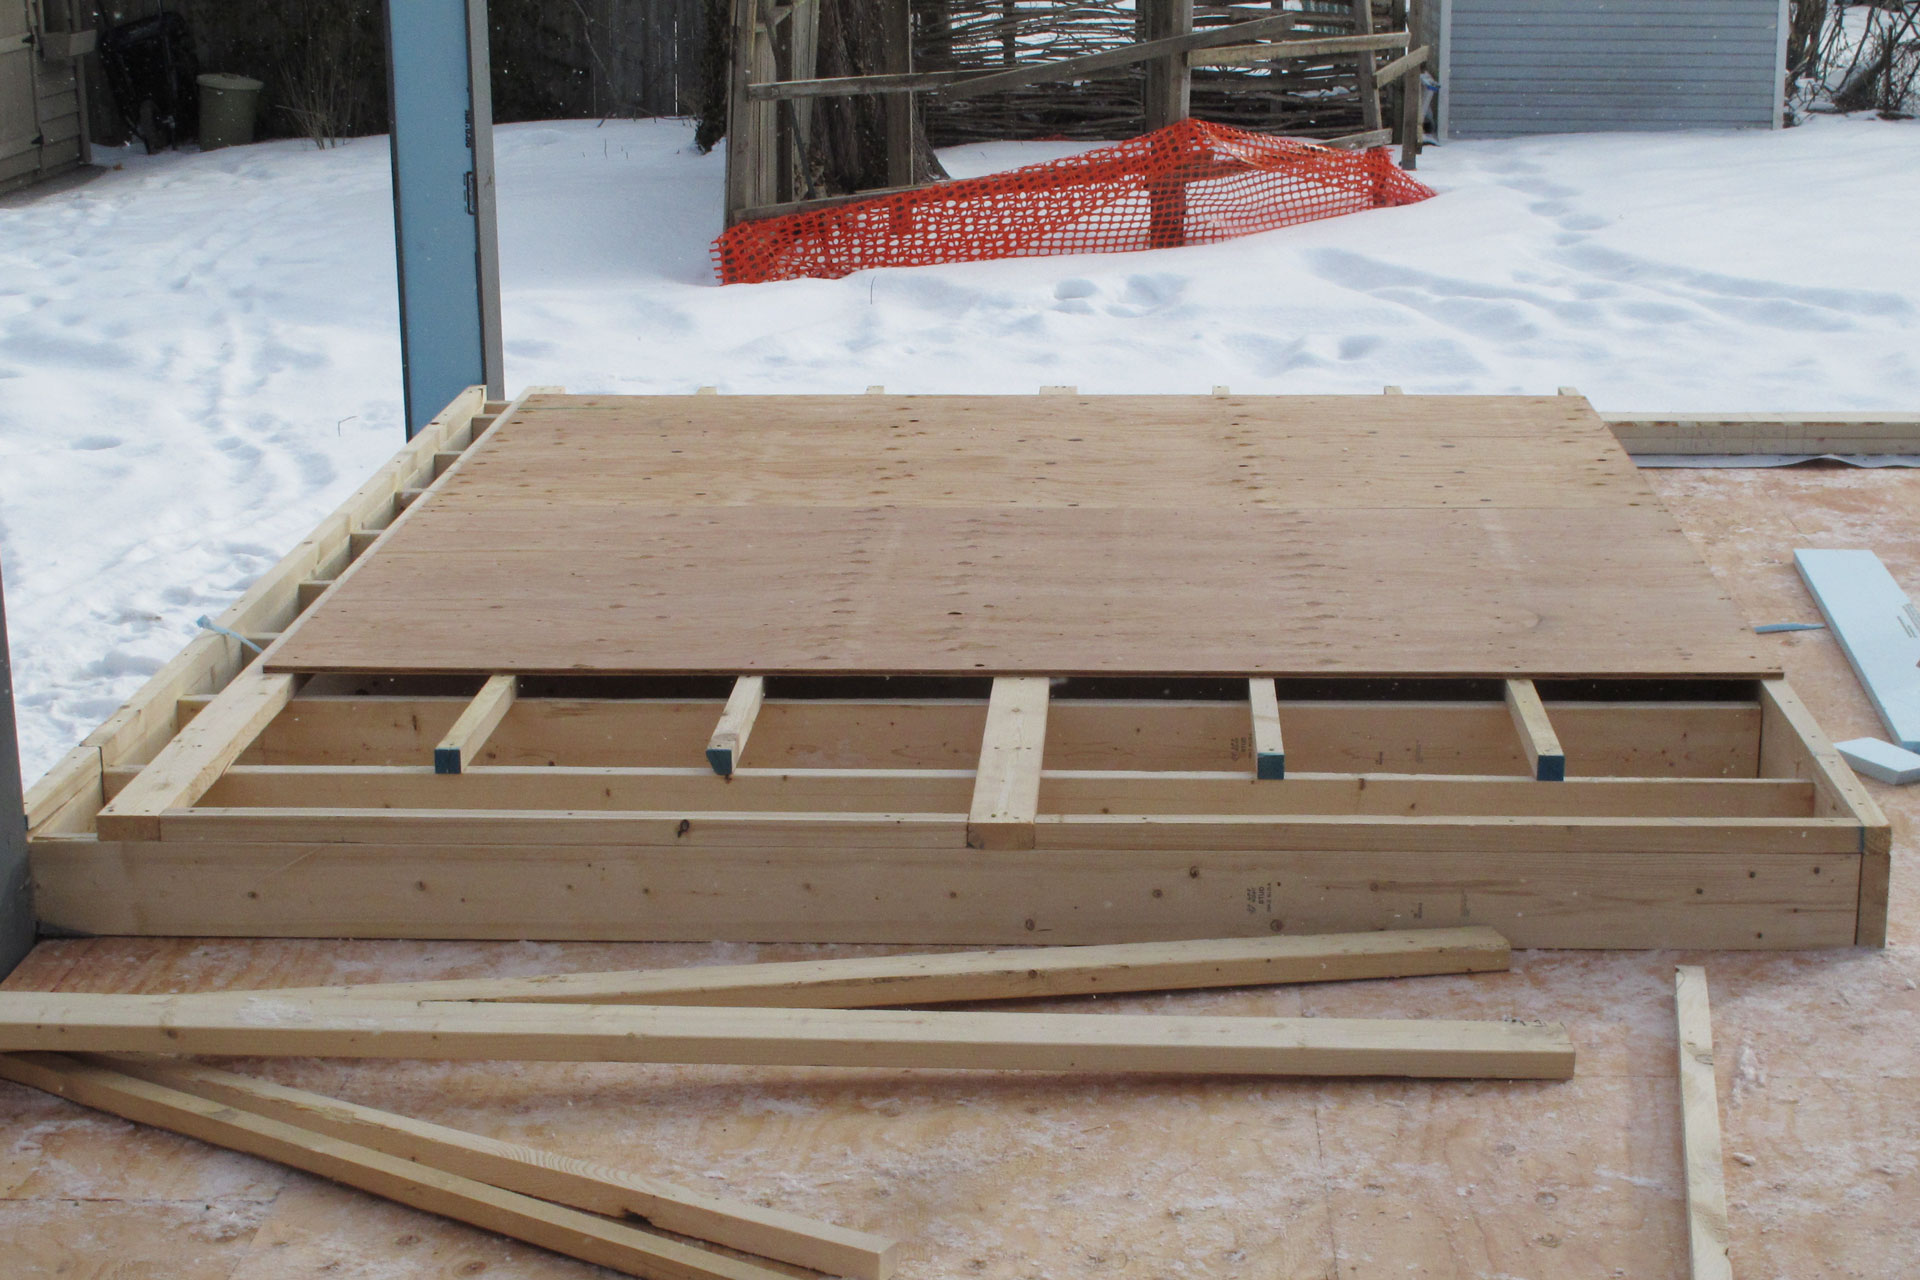
And here’s what the wall looks like while they are being framed. The only change of plan is that the framer decided to run a few 2×4 on the outside to nail the plywood sheathing because 2×2 splits too easily. This increases the thermal bridging a little bit, but not by much. Of course you only see the outside strapping. The inside strapping will be put up after the vapour barrier is put up.
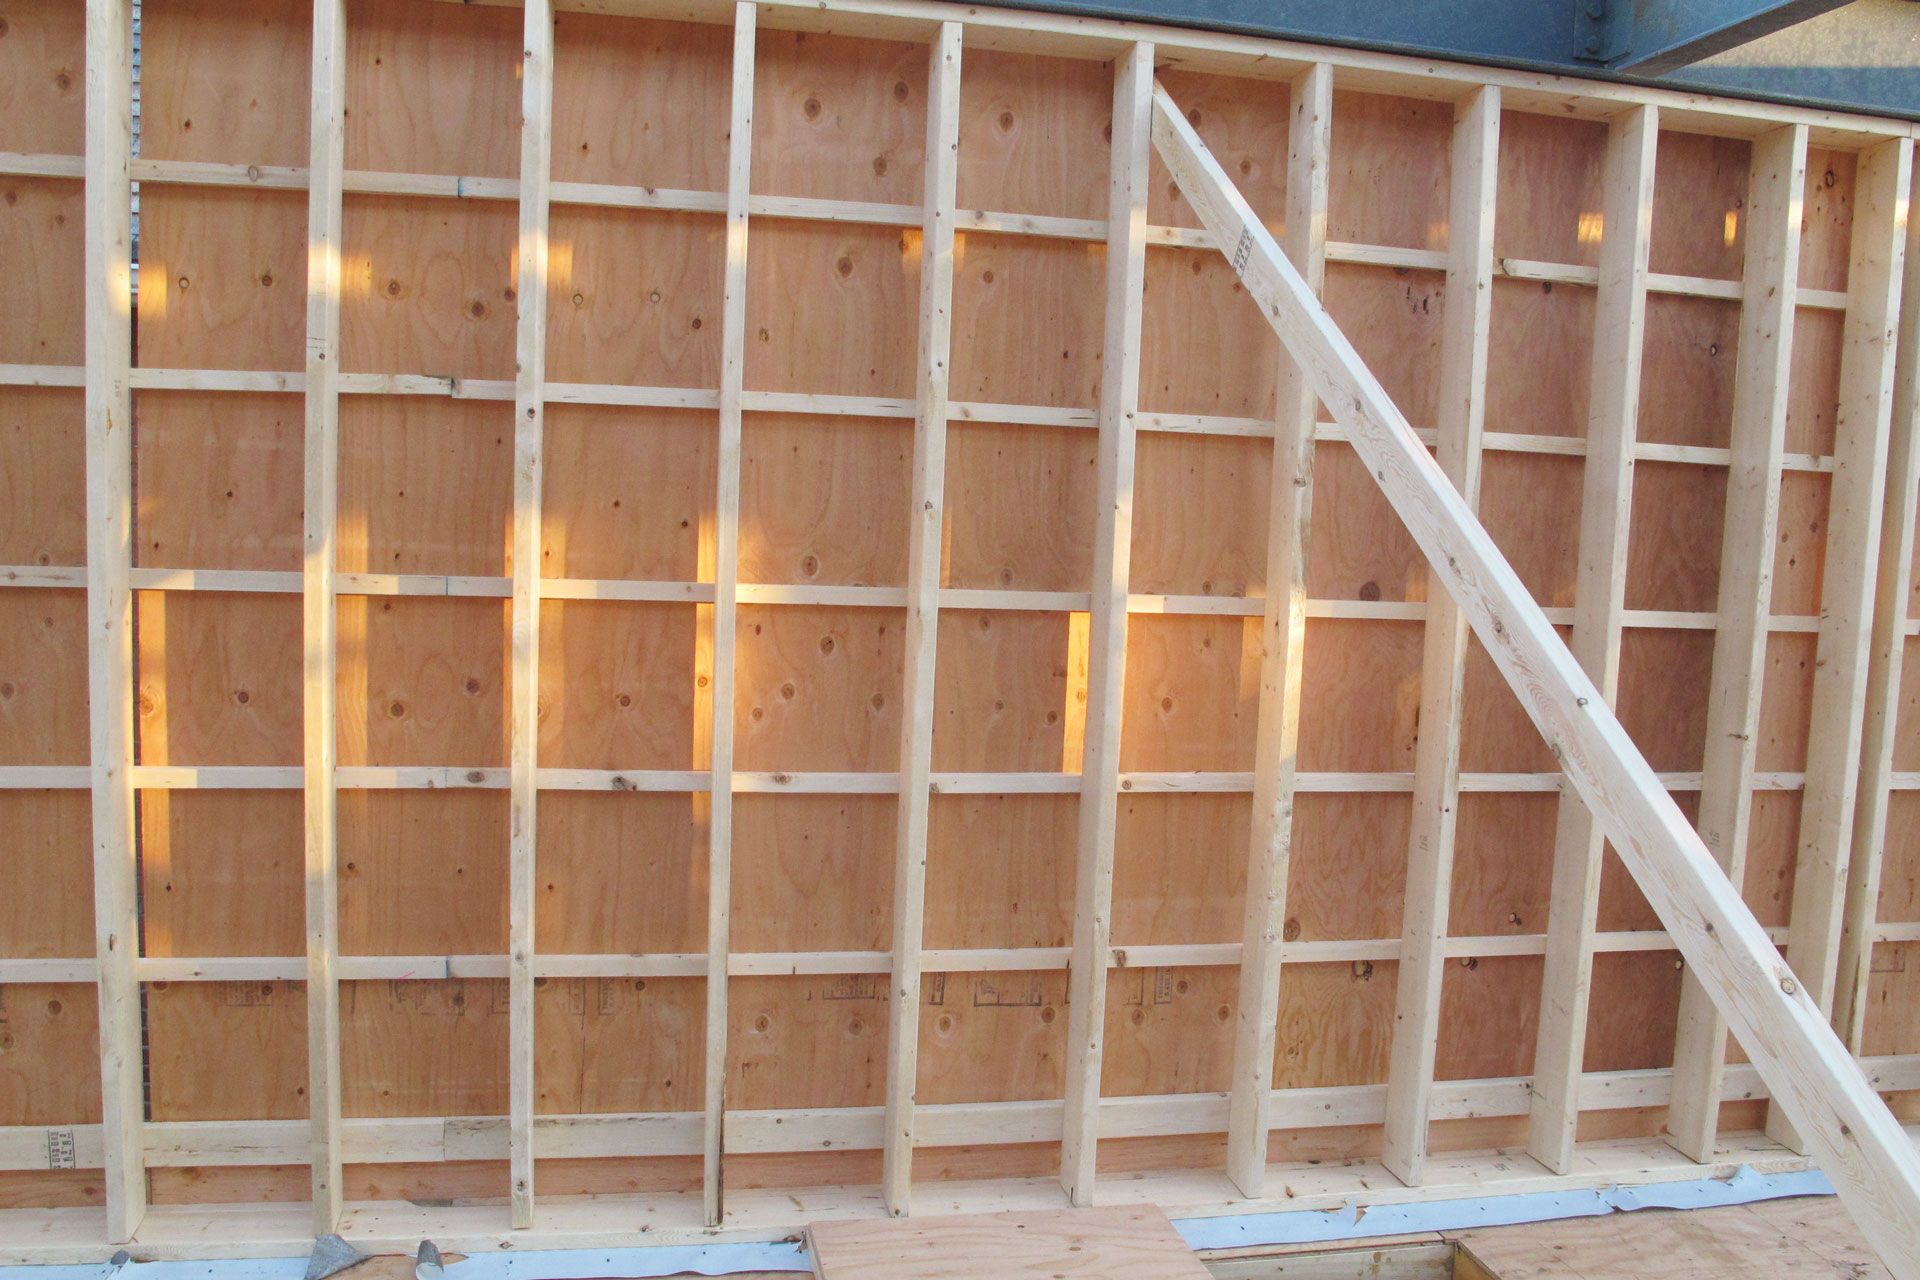
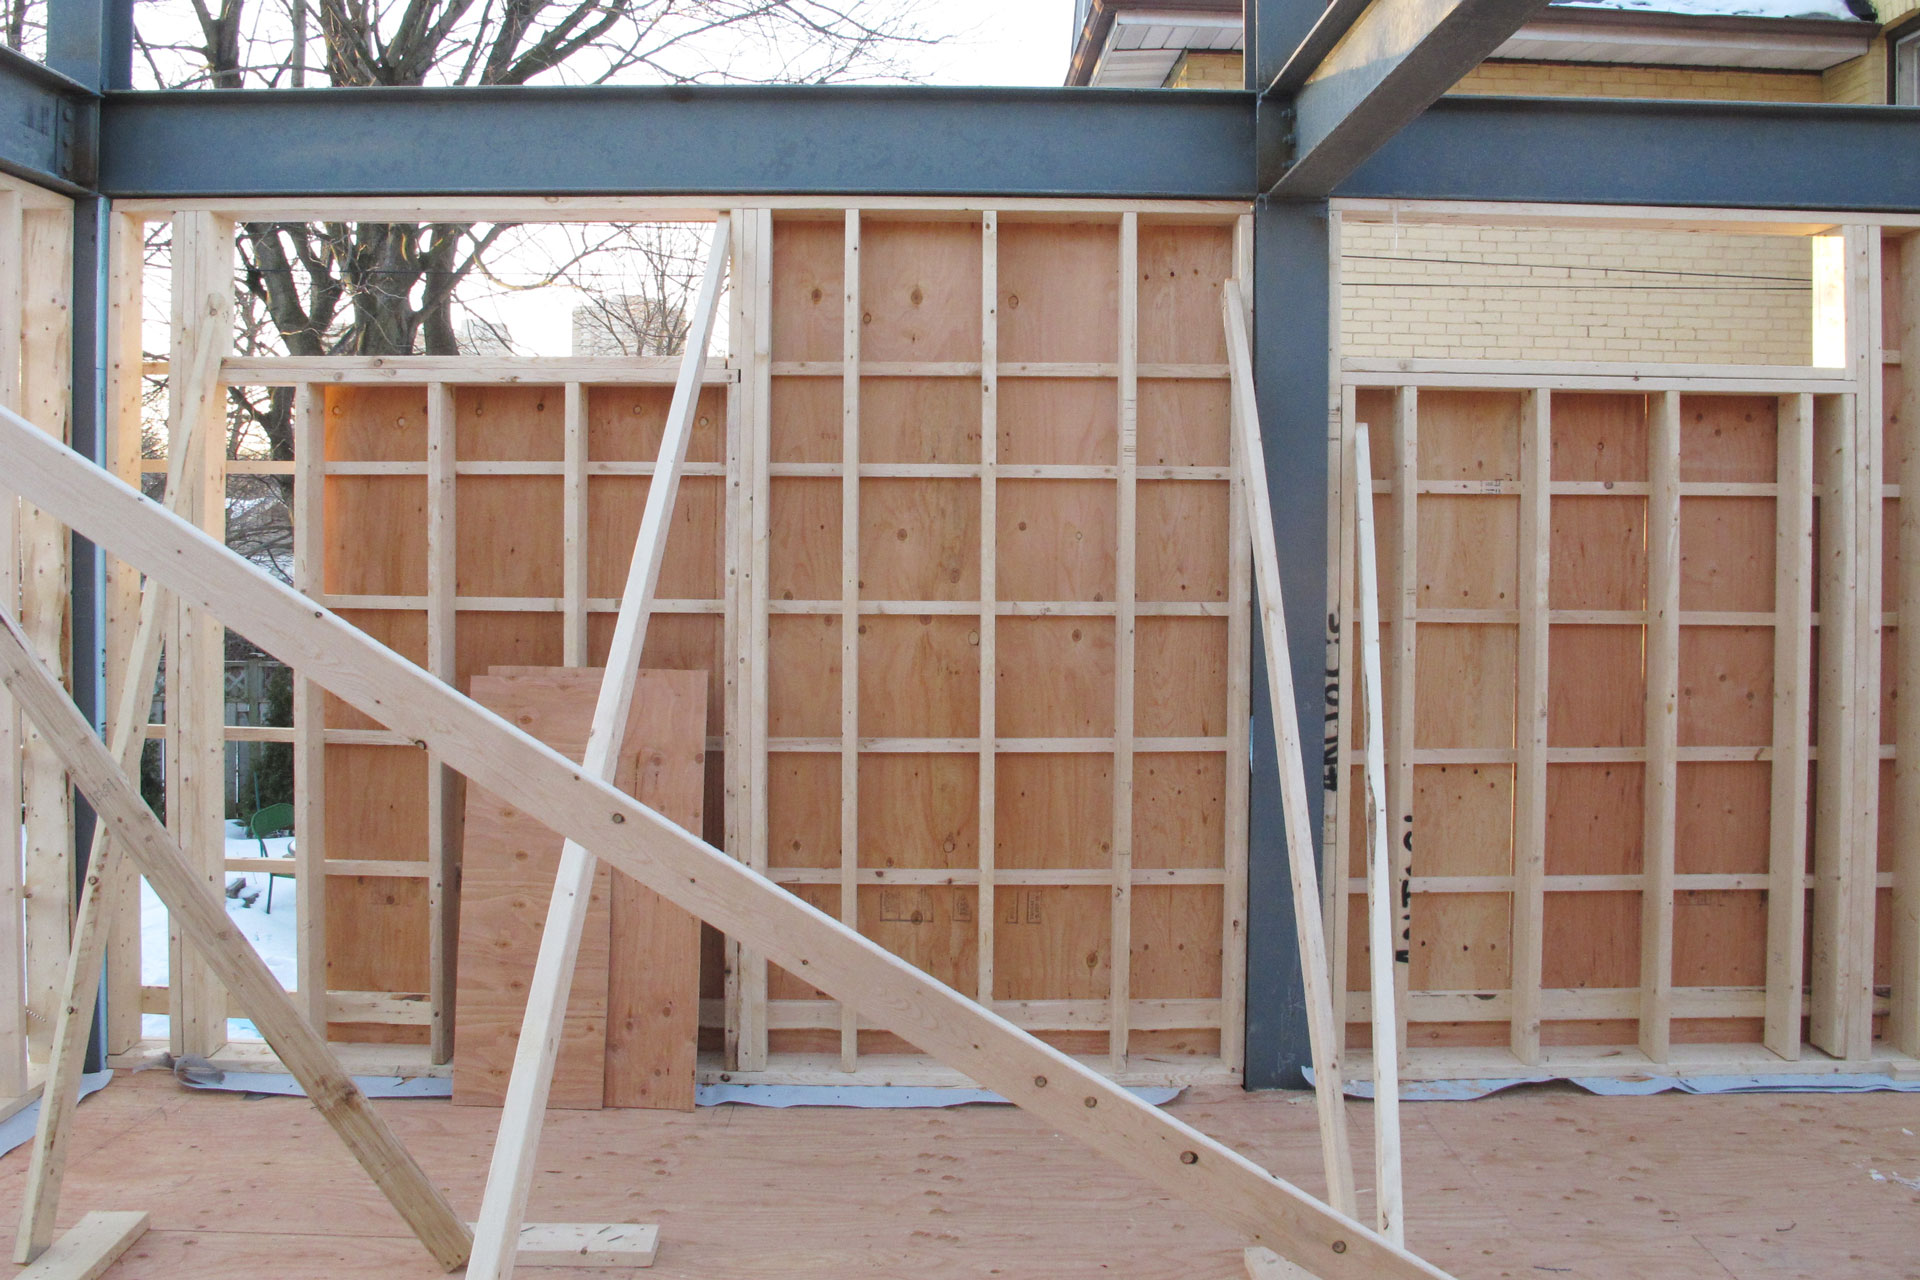
And this is what it looks like from inside. You can see the 16″ on center outside strapping. This is carried out throughout every exterior wall.
Leave a Reply
You must be logged in to post a comment.