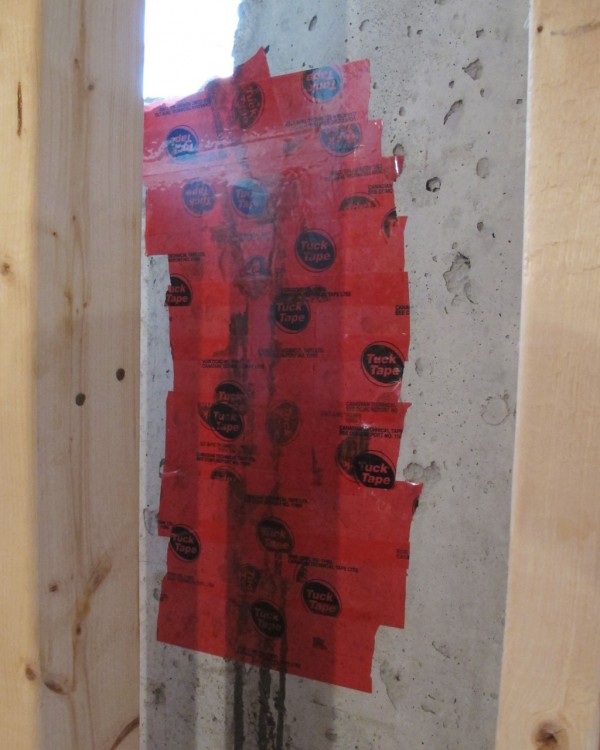
August 31st, 2014 I carefully checked the result from our last epoxy injection, and I found that the top part of the crack did not seem to be fully filled. It seems that that the epoxy have flown down the crack and accumulated at the bottom. So the bottom part of the crack is very nicely bounded and sealed while the top still seem to have some space. So we decided to do another round of epoxy injection just on the top three holes.
So we did the same drill as last time. We taped up the top three holes using tuck tape. Then we start to inject epoxy from the bottom hole let the epoxy rise up until it flows out of the hole above. Then we tape up the lower hole and move up.
Continue reading ‘Foundation wall crack repair – part 2’ »
August 31st, 2014 More sweat equity work that I’m putting into this house. The HVAC work is schedule to happen next week. However, on the duct wall, once the duct is in place, it is next to impossible to access the walls behind for insulation. So I will be filling these wall cavities with insulation now so that I don’t have a big headache later.
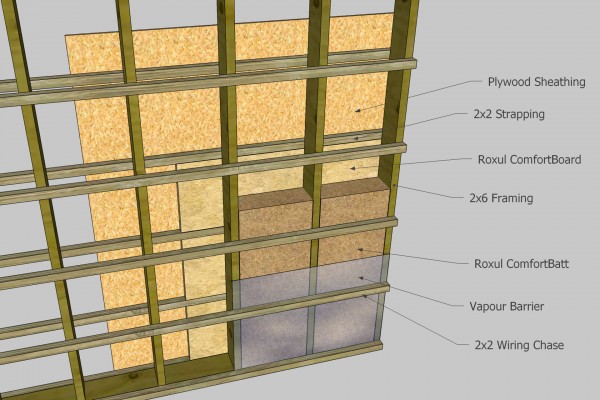
In my post “Exterior wall construction with Swedish roots“, I shows that my wall has a 2×2 outside strapping and a 2×6 framing. So to fill the space I will be inserting Roxul ComfortBoard into the 2×2 space. Then followed by Roxul ComfortBatt in the 2×6 stud space. The 1.5” thick Roxul ComfortBoard gives you R6 and I am using R24 Roxul ComfortBatt here. Giving me a total R value of R30. The exterior EIFS has another layer of Roxul ComfortBoard on it. So my north wall here should have a insulation value of over R36. I was targeting R40 for the walls and this is close enough.
Here’s what a typical wall construction in the house looks like.
Continue reading ‘Insulation’ »
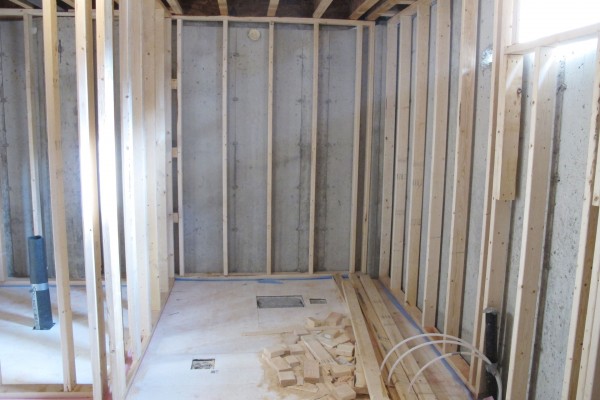
August 29th, 2014 Today we have two crews here working both from Pleasant Homes Construction. One crew is working to finish my duct wall on the north side and install the temporary stairs and guards. The original framing crew continues in the basement to finish my basement framing.
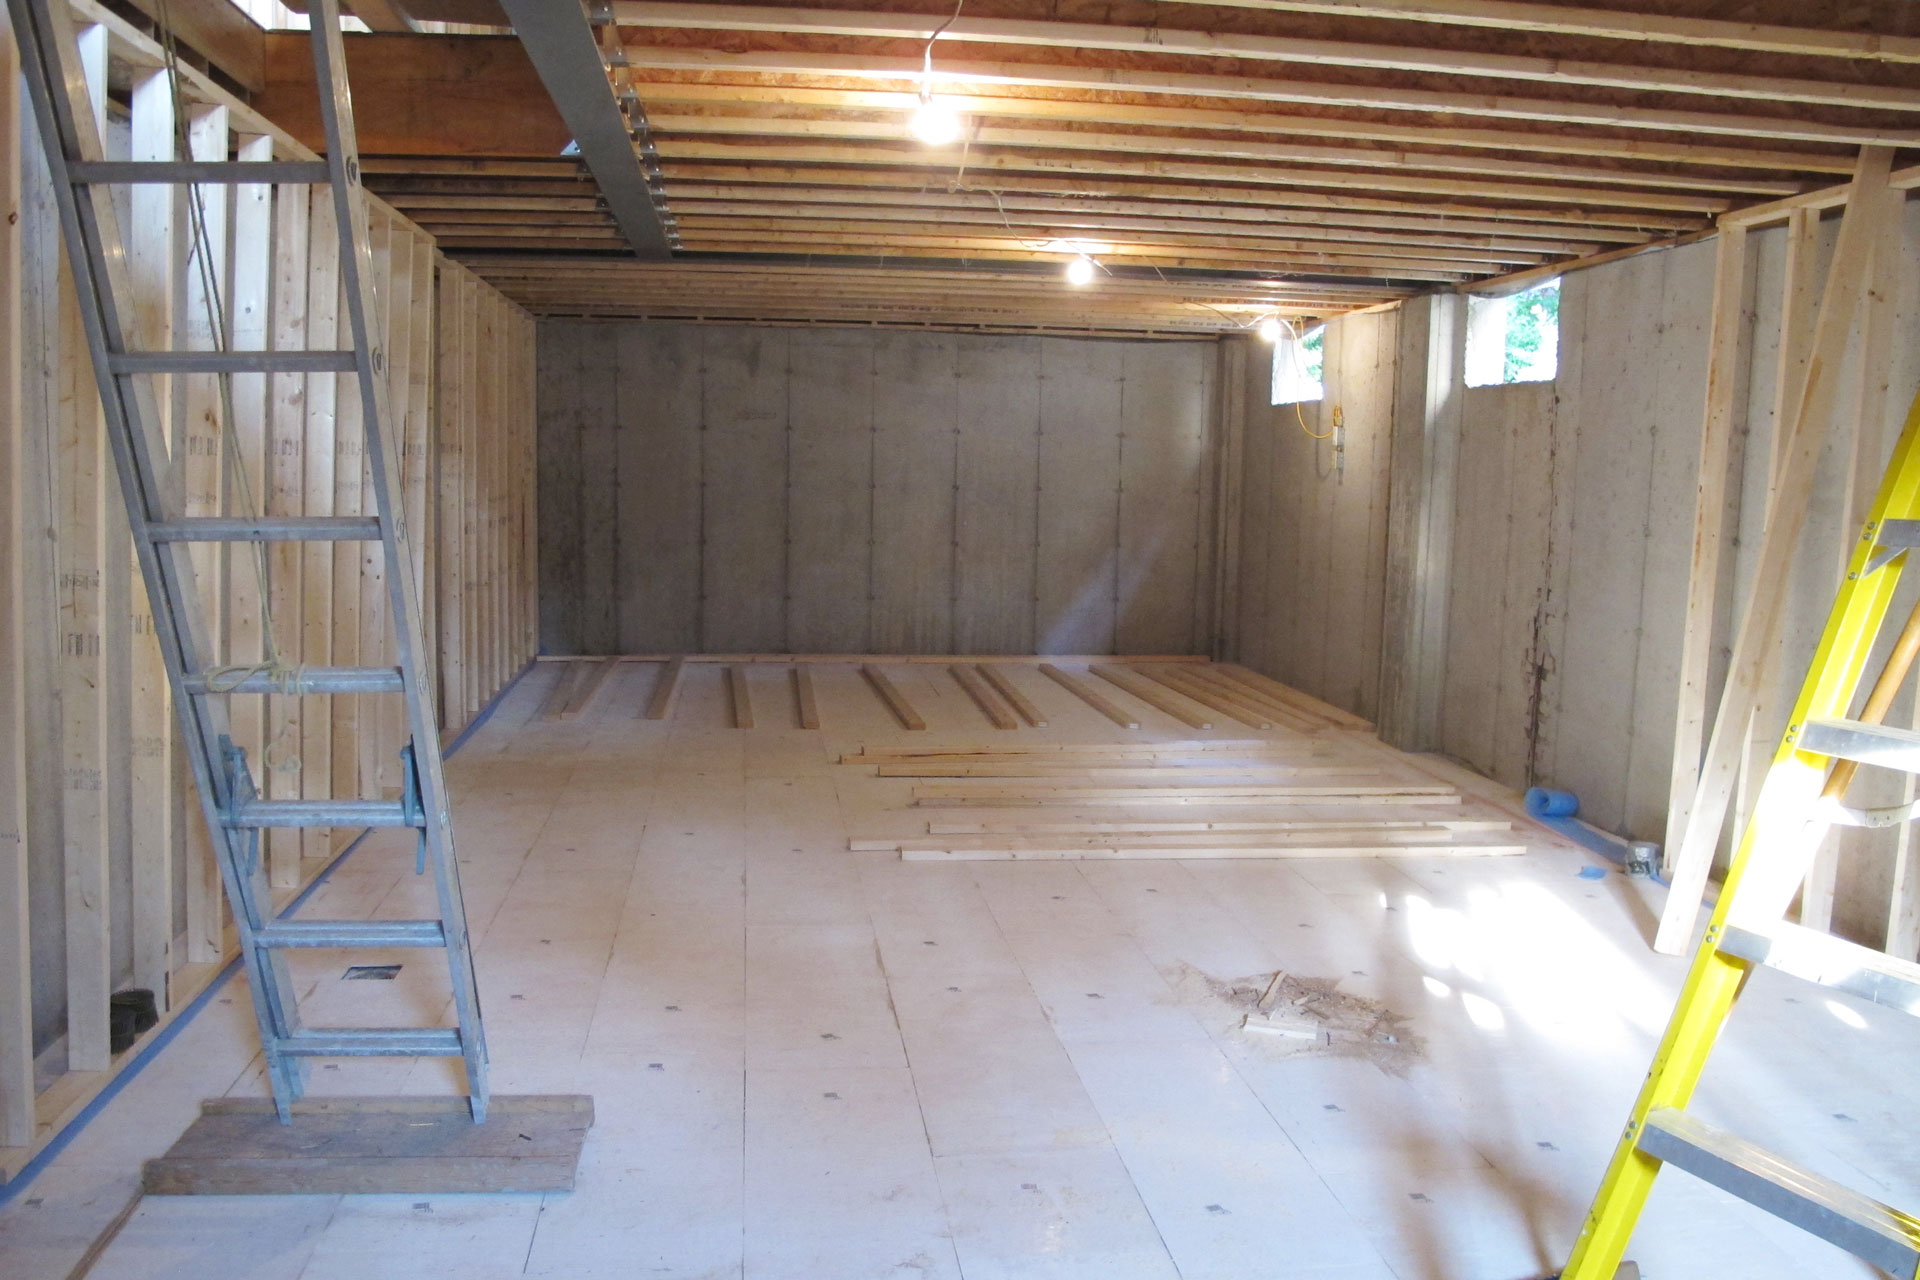
I want all basement framing finished with exception of the walls of the laundry room and the mechanical room. Because it is not certain if everything fits according to the floor plan. So here’s the laundry room.
Continue reading ‘Framing part 2 – day 5’ »
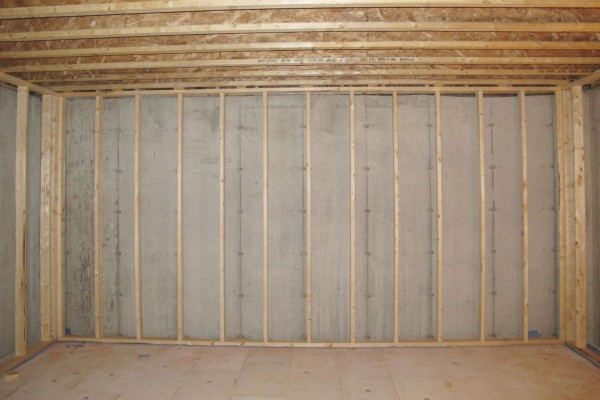
August 28th, 2014 Wednesday, the framing crew had mechanical trouble with their car and so very little work is done by the junior crew. Thursday the work continues. Carlos dropped by and indicated that he will bringing in another set of crews on Friday so that they can finish my work by the end of the week.
Here’s the east wall of the basement completed.
Continue reading ‘Framing part 2 – day 3 & 4’ »
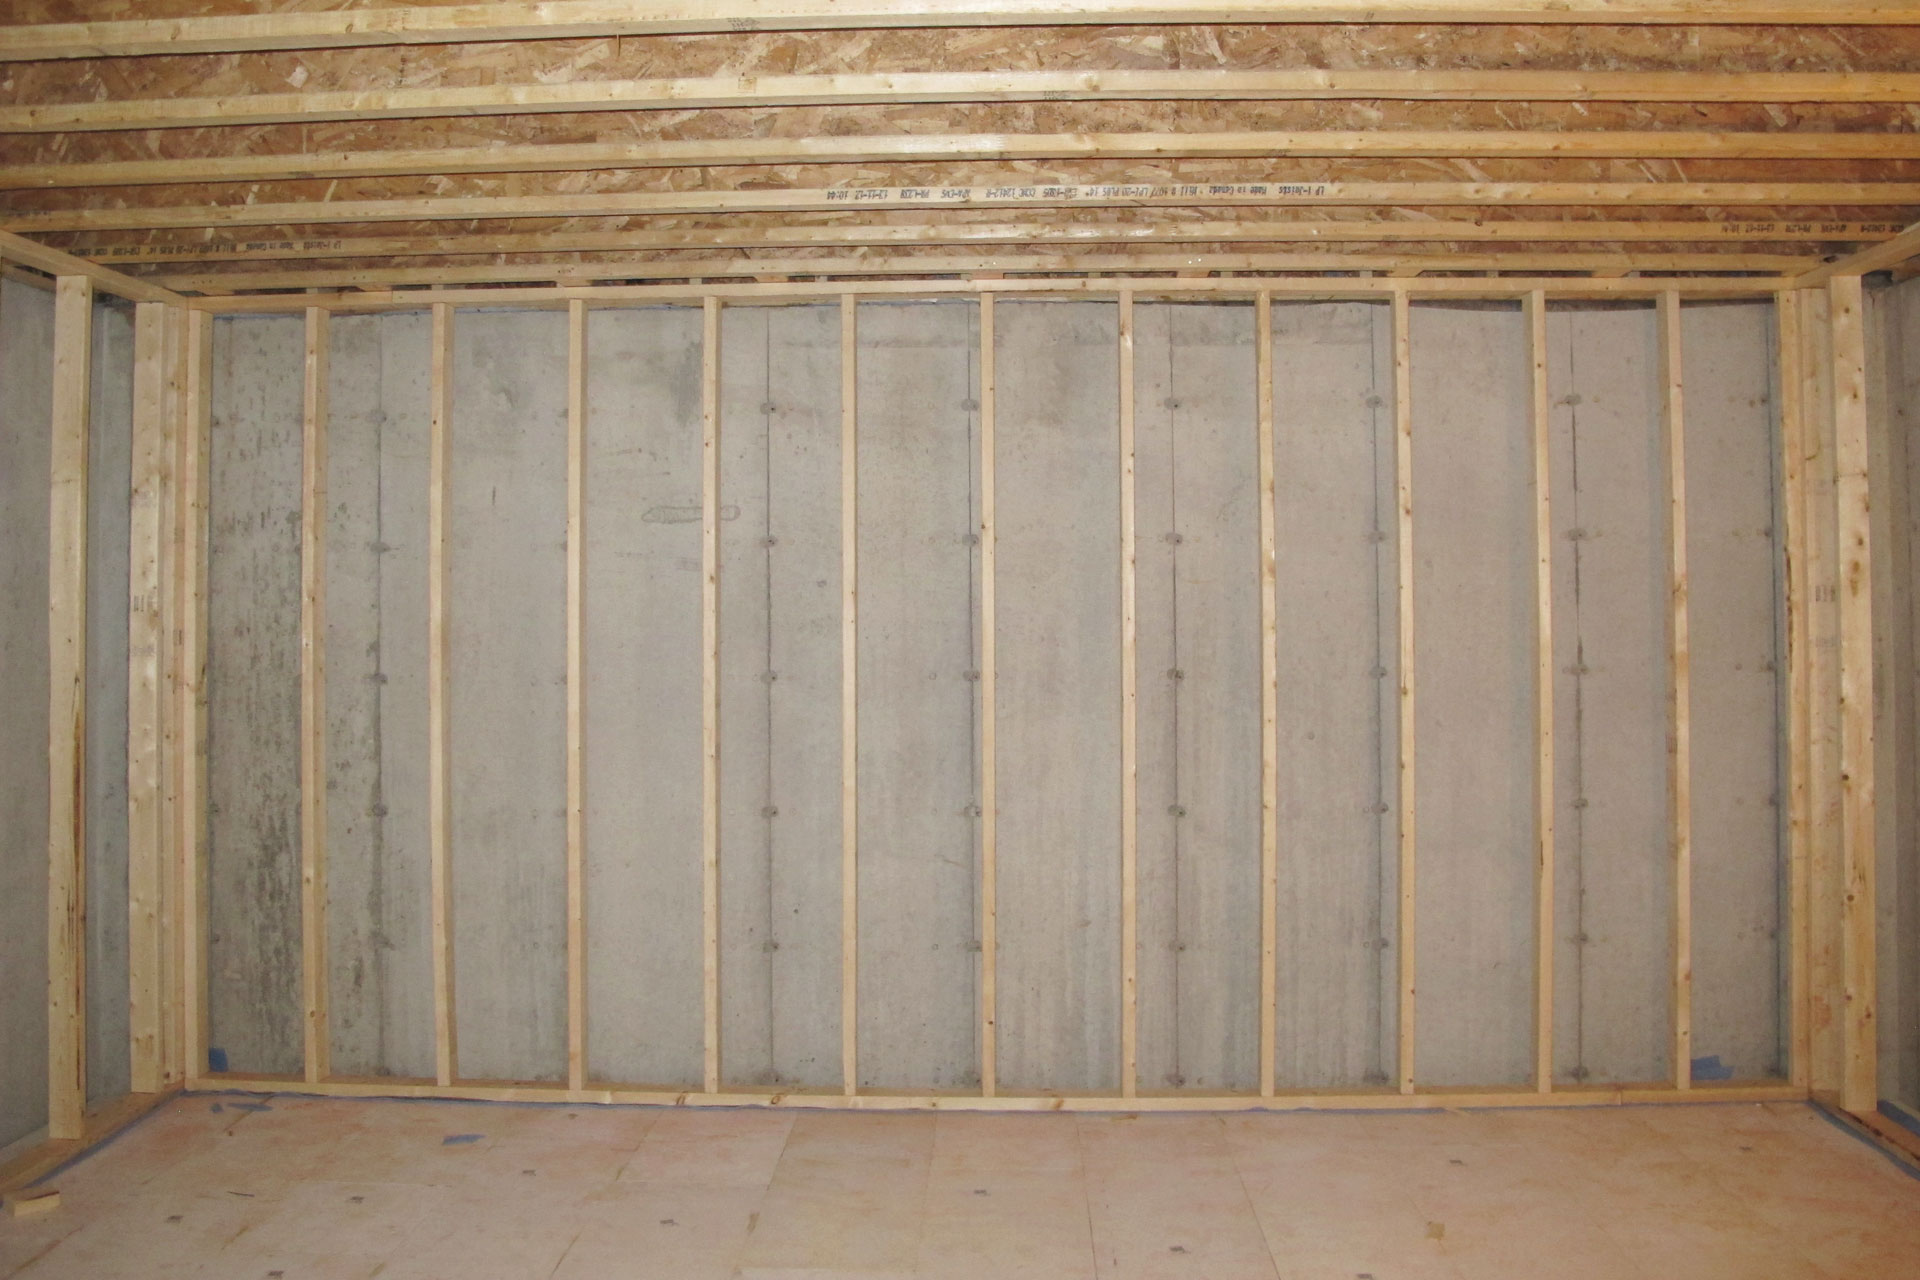
August 26th, 2014 Today the basement perimeter wall is being frame. wall is being framed right in front of the all piers so that I do not have any bumps in the basement area. The only room where pumps will be visible is the mechanical room and the laundry room. There due to the limited space, the perimeter will have to hug to wall so that we don’t lose too much valuable space.

Continue reading ‘Framing part 2 – day 2’ »
August 25th, 2014 Today Carlos’s crew from Pleasant Homes Construction begin second part of the framing. This includes all the basement framing, the duct walls, and temporary stair installations.
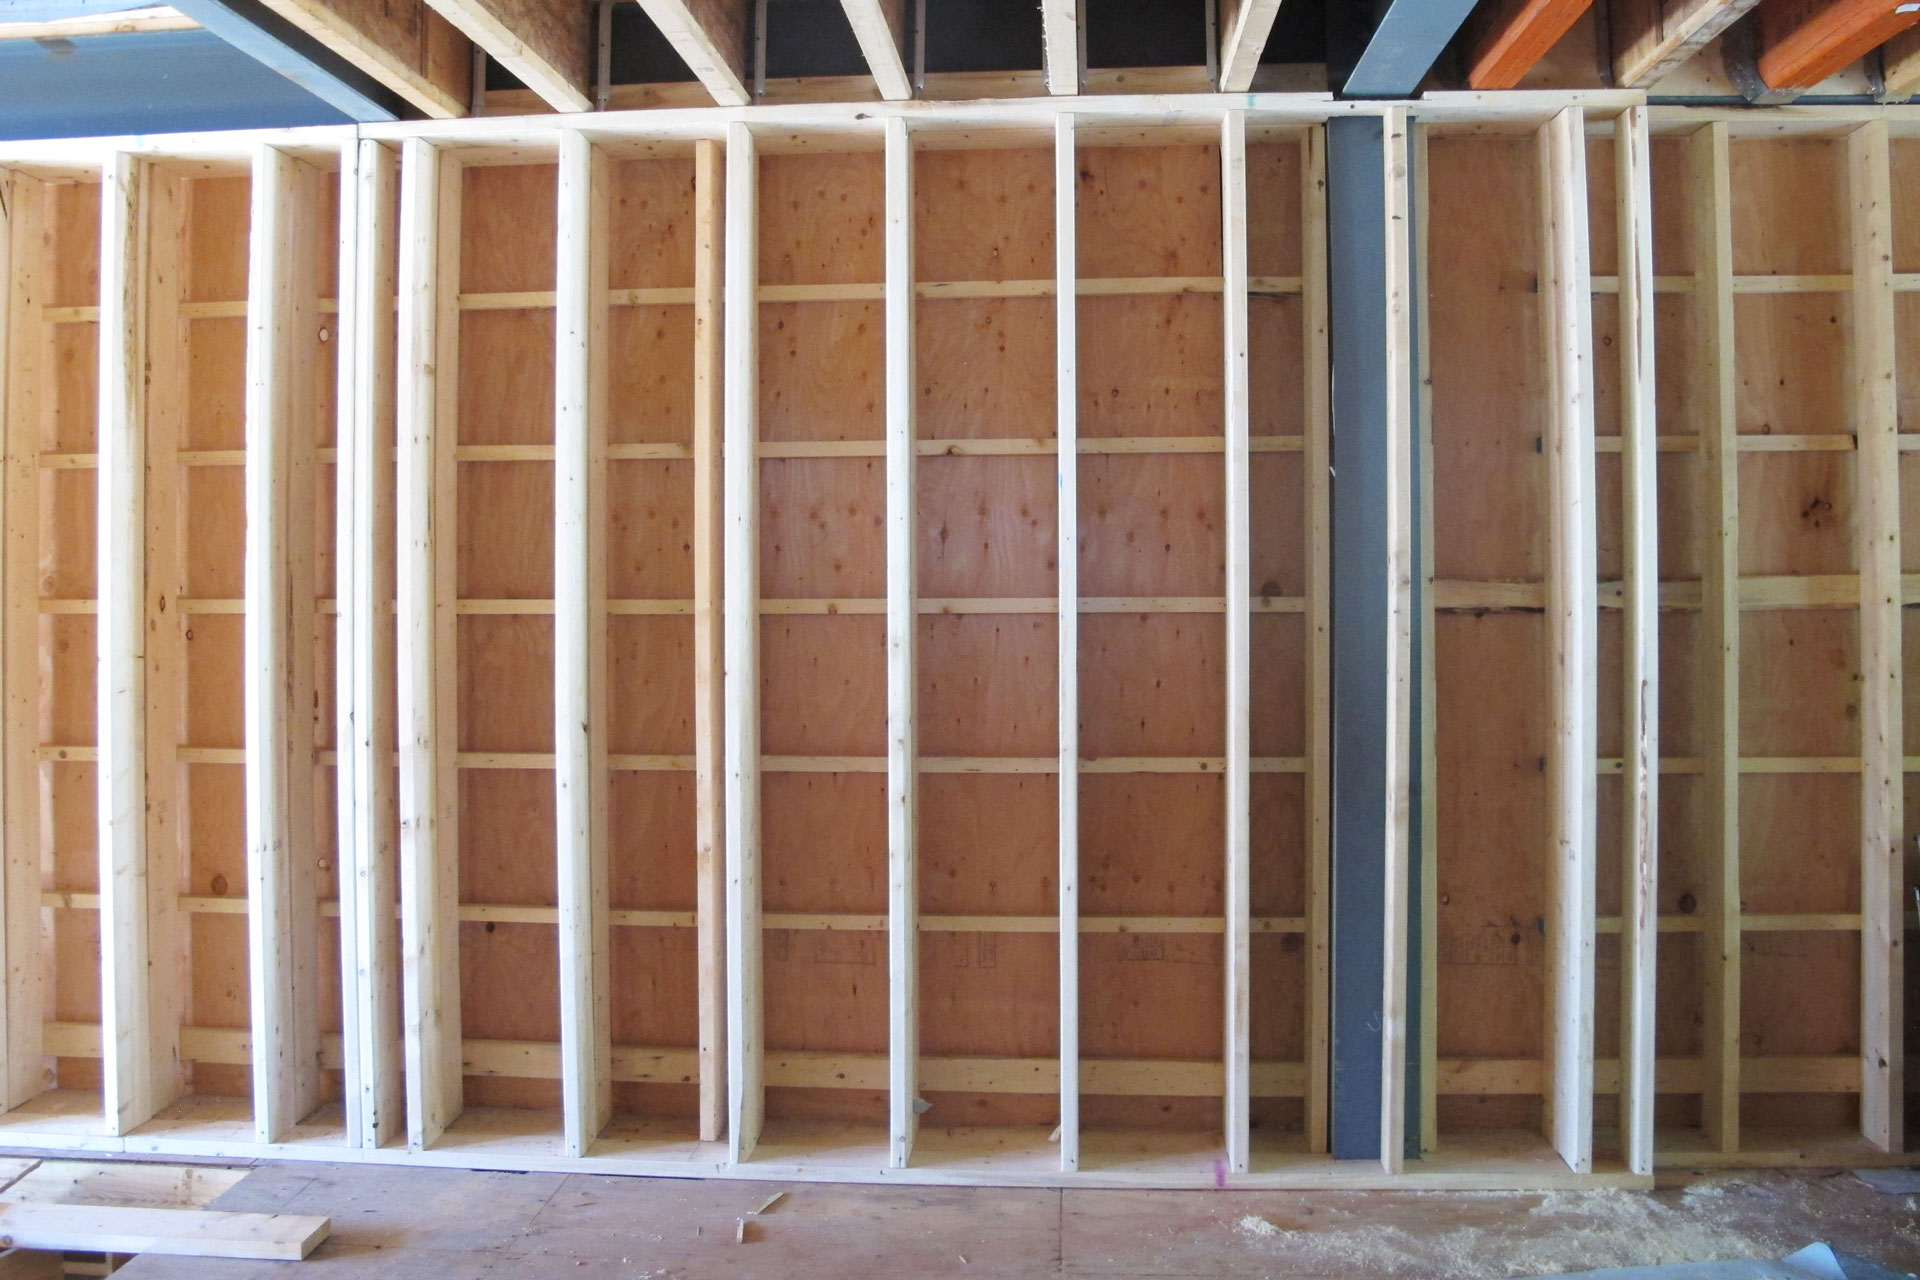
First day, they worked on my duct wall on the 1st floor. This house has very little interior walls and yet it has a complete separate set of duct for HRV. So the duct has to go somewhere. Now the duct is not going inside the exterior walls because it severely impacts insulation and it still can’t go from floor to floor due to steel beams. So they will have to come inside the exterior wall. From a design point of view, I don’t like to see bumps on the wall. So to address that, I’ve decide to run this duct wall all the way from the front opening space to the back. This way, you won’t think that this wall is here just to run ducts.
Here’s the duct wall at the back of the house. It’s 2×6 framing right in front of my exterior wall. The exterior wall is built using 2×2 strapping on a 2×6 wall. So the 2×6 in front makes the total wall thickness here 12.5″. And it’s about 4″ in front of the face of the steel column.

Continue reading ‘Framing part 2 – day 1’ »
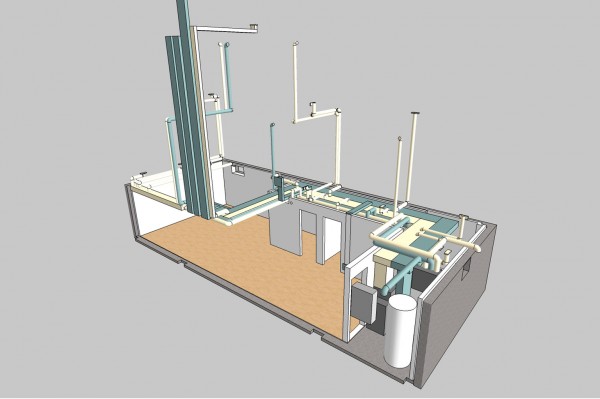
August 20th, 2014 Dean is here today to start some planning work on the HVAC duct installation. This house has a lot of duct work. There are two sets of separate duct since I want the HRV duct to run on its dedicated duct system. And the furnace is placed in the corner of the house with duct work laid out very specifically to make sure ceiling are high where it matters. And because of the small size of the house the duct must be place exactly or else it won’t have enough room to fit.
So before the HVAC work is even quotes, I have modeled all the duct work based on the revised HVAC design. I then produced a 3D layout of how I think the duct will run and give that to Dean so that he understand what I am after.
Continue reading ‘HVAC & ESA inspection’ »
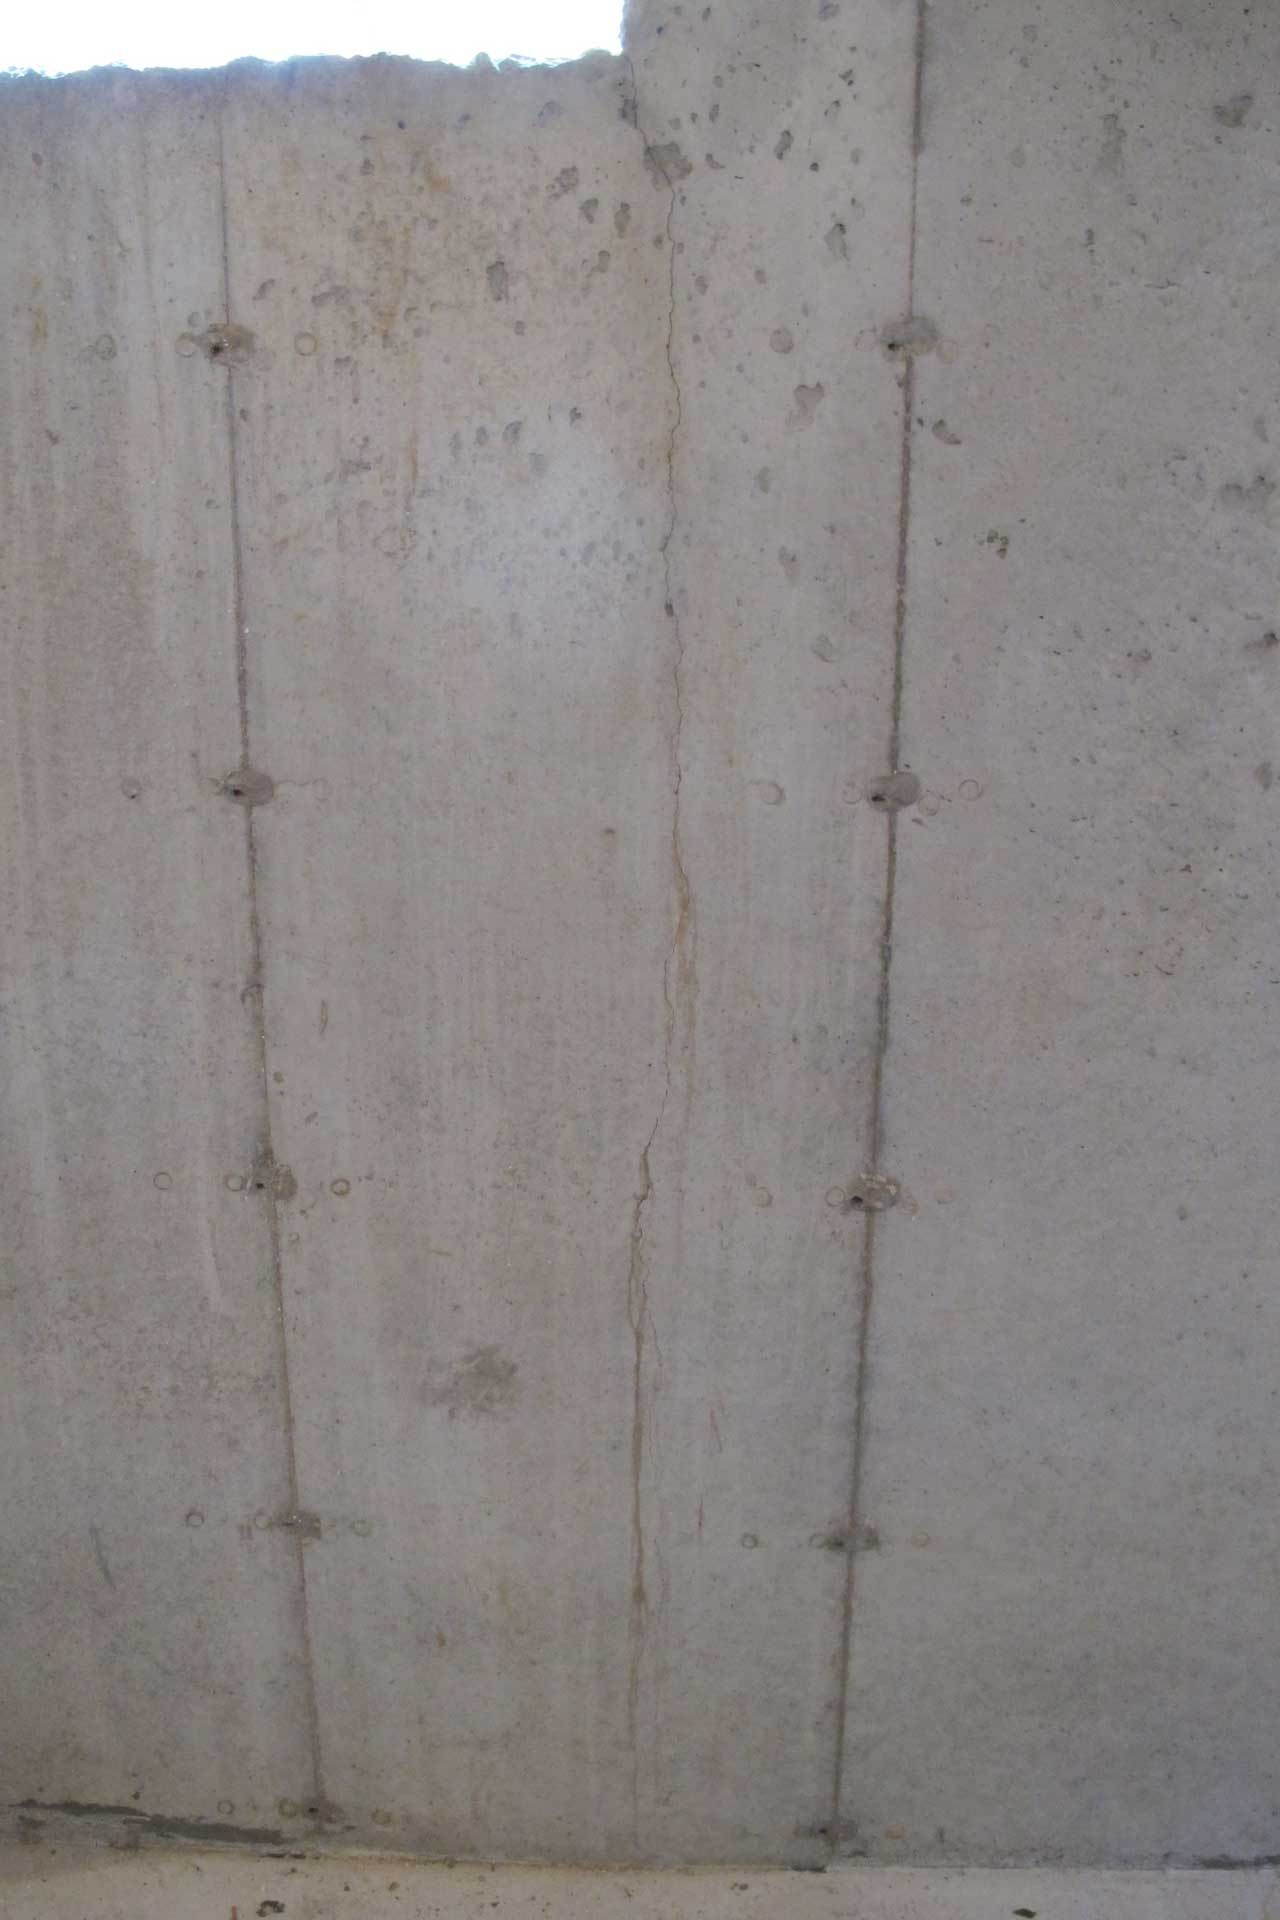
August 19th, 2014 I just found out recently that I still ended up with a crack on my foundation wall. This is a classical case of hairline crack in the foundation wall for poured concrete. It is located right at the window opening, it is vertical and goes straight down.

Continue reading ‘Foundation wall crack repair’ »
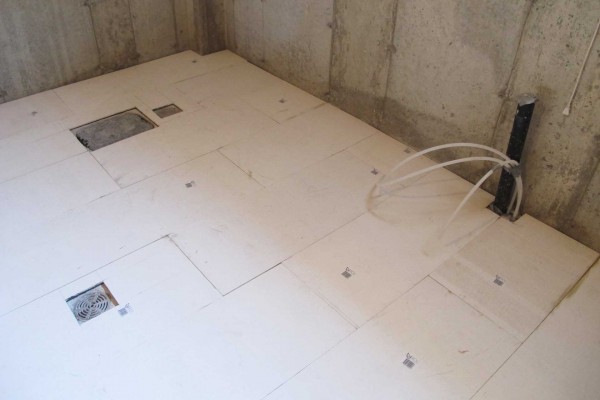
August 19th, 2014 The basement sub-floor work continues today. The remaining work was relatively simple and straight forward. Not a lot of pieces let to cut and so we were putting down panels very quickly. We completed the rest of the basement before noon today.
Here’s a looking at the entire basement sub-floor. Here’s where the laundry room will be. You can see in the top left corner the backwater valve access port and the house clean out. In the bottom left is the floor drain in the laundry room. And to the right is the sink drain and the primer lines for the floor drains.
Continue reading ‘Basement subfloor day 2’ »
August 18th, 2014 So I decide to put in some sweat equity into this house. The basement sub-floor is really easy to do and so I decide that I will do it together with my cousin. We started on the south wall. We snapped a chalk line for the first row to line up again, and then start to lay these Tyroc panels. down. The installation is really simple since you just put glues (PL Premium) on the exposed ship-lap tab and glue the panels together.

Continue reading ‘Basement subfloor day 1’ »
|
|